
Sources higher in the OBS list appear above the ones below. Stack three overlapping colour blocks to see it happen before arranging your webcam, game and border.
You can predict which source covers another and find a layer that’s hidden, covered or out of place.
In this guide
Before you start
- OBS Studio open with no broadcast running.
- A new practice scene or separate Scene Collection.
- No camera, downloaded graphics or plugin needed.
1. Give yourself a scene to practise in
Create a practice area with a name you won’t confuse with your live setup, such as “Layer practice”. You can use a separate Scene Collection to keep the exercise apart. Collections hold scenes and sources; profiles hold output-related settings. Switching profiles won’t bring back a layout you changed.
If you already have a setup you rely on, export the relevant collection before experimenting. Note which collection and profile are selected and keep the existing output profile. A little preparation here saves trying to remember exactly how your working scenes looked.
2. Add three blocks and make them overlap
Use the + control in Sources to add a Color Source. Make an opaque navy background, a smaller orange block and a smaller turquoise block. Name them after their colours, then move the two small blocks so part of one overlaps the other.
Color Source gives you a solid colour with adjustable width and height. The sizes and colours don’t need to match a preset. You just need to see the overlap clearly, so keep the blocks opaque. A transparent block would make it harder to see what’s covering what.
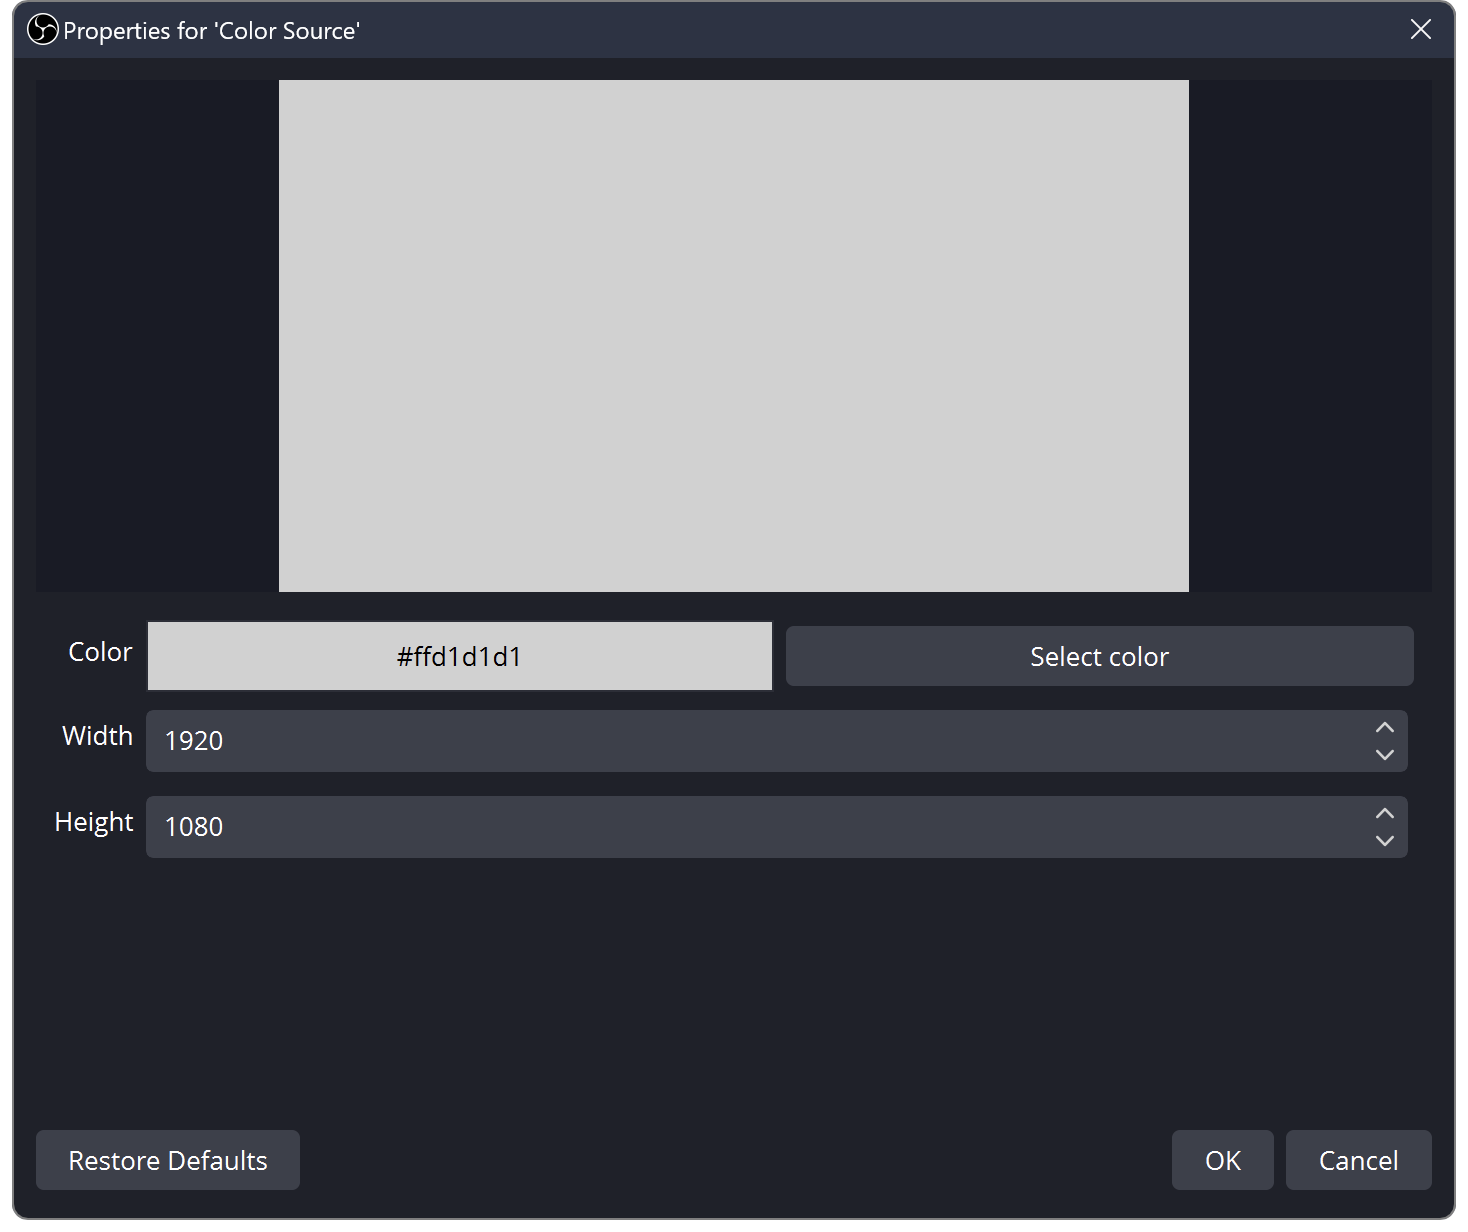
A Color Source has a colour and its own width and height. Use these controls to make the blocks in the layer-order exercise.
Once you can see the source, check what makes a video start, stop or loop. OBS Media Source Not Playing or Looping? Start Here ↗
3. Guess which block will be on top
Look at the source list before moving anything. Which colour should show where the small blocks overlap? Move one above the other in the list. The higher source covers the lower one where their opaque areas meet.
Swap them back and watch the result. Once that makes sense, the usual stream stack becomes easier to read: game below, webcam above it, border above the webcam. The list describes what sits in front, not which item you added first or which one is most important.
If the layers are right but a capture is still black, check the capture source itself. OBS Black Screen? Check the Capture Source on Windows or Mac ↗
4. Hide a block, then cover one
Use the top block’s visibility control to hide it, then show it again. Now move the full-size background to the top of the list. It should cover the small blocks. Put it back underneath when you’re done.
Those are two different reasons for a source to disappear. It might be hidden, covered by another item, absent from the scene or positioned outside the visible canvas. Check which one you have before replacing the file. A source can be working perfectly while an opaque background sits on top of it.
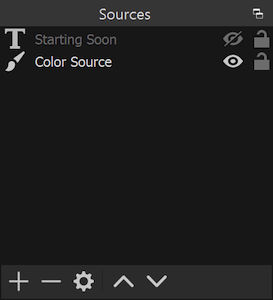
Sources near the top draw over the sources below. The eye control changes visibility; the plus button adds another source.
5. Make another scene with a different job
Create a second practice scene and arrange its blocks differently. Give the scenes names such as “Game” and “Chat” so you can recognise them when switching. Move between them and notice which arrangement appears on the canvas.
The sources are the ingredients; the scene is their layout. A collection groups scenes and their sources. Your profile handles output-related settings. Keeping those jobs straight helps when a layout looks right after import but your recording settings still need attention.
6. Use the same logic on your real scene
Return to a real scene and write down its intended order from top to bottom. For example: border and labels, webcam, game. Only include what your layout needs. Understanding layers doesn’t mean filling the screen with more of them.
If something vanishes, use the same checks you just practised: is it visible, is something covering it, and is it on the canvas? Then make a short recording with a scene change. You should be able to explain what sits in front of what, rather than moving items at random until the picture returns.
Move the example before moving your live scene
Use the layering sandbox on this page to bring the camera example or text panel forward. Watch the drawing as the order changes: an opaque background in front covers everything behind it.
The sandbox is an original diagram, not an OBS screenshot or a connection to your scene collection. Once the order makes sense, return to a copied scene in OBS and check the real sources there.
Move a layer. See what it covers.
This is an original layering sandbox, not an OBS screenshot. The list runs from the back to the front.
JavaScript powers your local preview and download.
A solid background in front hides the camera and text. In OBS, check the actual source list after making a copy of the scene.
No account or upload. Selected files and entered text stay on this device; exports are saved only when you ask.
If you need the next part of this task. Open the related tool ↗
Separate a visibility problem from an off-canvas transform
A source can be enabled and still not appear because it is covered, outside the canvas or reduced to a tiny size. In a duplicate test scene, put a visible Color Source behind it and move the suspect source to the top. Keep the original scene available while diagnosing.
If the source stays absent, inspect its transform rather than repeatedly clicking the visibility icon. For a capture with a stuck size, OBS documents Reset Transform followed by Fit to Screen. Reapply the deliberate crop and position only after the source can be seen.
| Observation | Next change | Expected result |
|---|---|---|
| Source appears when moved above another item | Restore the intended front-to-back order | Visibility is solved by layers, not recapturing the device |
| Only a small selection handle appears at the canvas edge | Reset and inspect the transform in the test scene | Recover a visible source before designing its layout |
| Source remains blank at a normal size and top layer | Inspect its content or capture route | Separate empty source data from composition |
Follow capture troubleshooting if the source is empty at a visible size. OBS Black Screen? Check the Capture Source on Windows or Mac ↗
Still stuck?
The source is in the list, but you can’t see it.
Check visibility, opaque layers above it and whether it sits outside the canvas.
Switching profiles didn’t restore your layout.
Look at the selected Scene Collection. Profiles store output settings rather than scene layouts.
The frame shows, but the webcam spills beyond it.
Crop the webcam to the opening instead of expecting the border to hide it. Continue with this guide ↗
Sources & references
This exercise uses the scene, source and Color Source controls described in OBS’s official guides. November 2026 addition: documentation-based diagnostic examples; no new hands-on hardware result or platform upload test is claimed.
- OBS: Color Source ↗Checked 2026-10-18 · Published January 11, 2022
- OBS: Sources Guide ↗Checked 2026-11-04 · Published January 11, 2022
- OBS: Scene Collections ↗Checked 2026-10-18 · Published January 14, 2022
- OBS: Profiles ↗Checked 2026-10-18 · Published January 14, 2022
- OBS source: English interface labels ↗Checked 2026-10-18
- OBS — Game Capture Troubleshooting ↗Checked 2026-11-04
Spotted something out of date? Let Alex know.
How we put our guides together ↗