
To crop your webcam in OBS, hold Alt (Option on a Mac) and drag one of the edges of the camera. Crop first, then resize from a corner so your face doesn't get squished.
- Click your webcam in OBS. Hold Alt (Option on Mac) and drag an edge inward. You'll see a green line where it's cropped.
- Want exact numbers? Right-click the webcam > Transform > Edit Transform (Ctrl+E, or Cmd+E on Mac) and type the crop values.
- To resize, always drag a corner, not a side. That keeps your face from stretching.
- Already looks stretched? Right-click > Transform > Reset Transform and start over.
- Want the same crop in every scene? Use a Crop/Pad filter instead. Just know it changes the camera everywhere you use it.
- Using a webcam frame? Put the frame above the camera in your sources list. An empty hole in a frame won't crop the camera underneath.
The webcam fits its rectangular opening without distorting your face or unexpectedly changing other scenes.
In this guide
Before you start
- A webcam source that already shows a picture.
- Your frame image or a rectangular area you want the camera to fill.
- A test scene for comparing the camera before and after the crop.
1. Start with a normal camera picture
Open the video-capture properties and check the selected device. You want the expected, uncropped picture before working on the frame. If there’s no picture at all, fix the connection or permission issue first; cropping won’t bring a disconnected camera back.
Decide what belongs in the shot while you talk: your head, some room above it and perhaps your hands. Leave enough space for the way you actually move. A crop that looks neat while you sit perfectly still can cut off your face the moment you lean forward.
Use a numeric crop when the frame opening must match
For an illustrative 1920 × 1080 camera image, a centred square crop removes 420 pixels from each side and keeps 1080 × 1080. This is geometry, not a required webcam resolution. Replace those numbers with the actual source dimensions and keep your eyes inside the chosen opening before scaling it into the artwork.
Use a per-scene transform crop when only this scene needs the square. OBS documents that the Crop/Pad filter changes the base source and therefore all its instances. Before adding that filter, check whether another scene uses the same camera for a wide shot.
| Observation | Next change | Expected result |
|---|---|---|
| The frame is square but your face looks stretched | Crop to the intended ratio, then scale proportionally | Natural face proportions inside the opening |
| Fixing the close-up also changes another scene | Check whether a source-level Crop/Pad filter is responsible | Keep the wide shot and close-up independently composed |
| The border covers your chin during movement | Adjust crop position and camera framing together | Normal seated motion remains inside the useful opening |
Place the decorative frame above the camera after the crop is correct. OBS Source Order: Learn Layers with Three Colour Blocks ↗
2. Measure the opening, not the whole frame
A 400 × 300 opening is 4:3. A 1280 × 720 camera picture is 16:9. To fit that wider image into the opening without distorting it, you’ll need to crop some image away or leave unused space.
Here’s the crop maths for that example: keeping the full 720-pixel height at 4:3 gives you a 960-pixel width, because 720 × 4 ÷ 3 = 960. A centred crop removes 160 pixels from each side. Use that to understand the shape, not as a camera-resolution preset. If you sit off-centre, crop more from one side than the other.
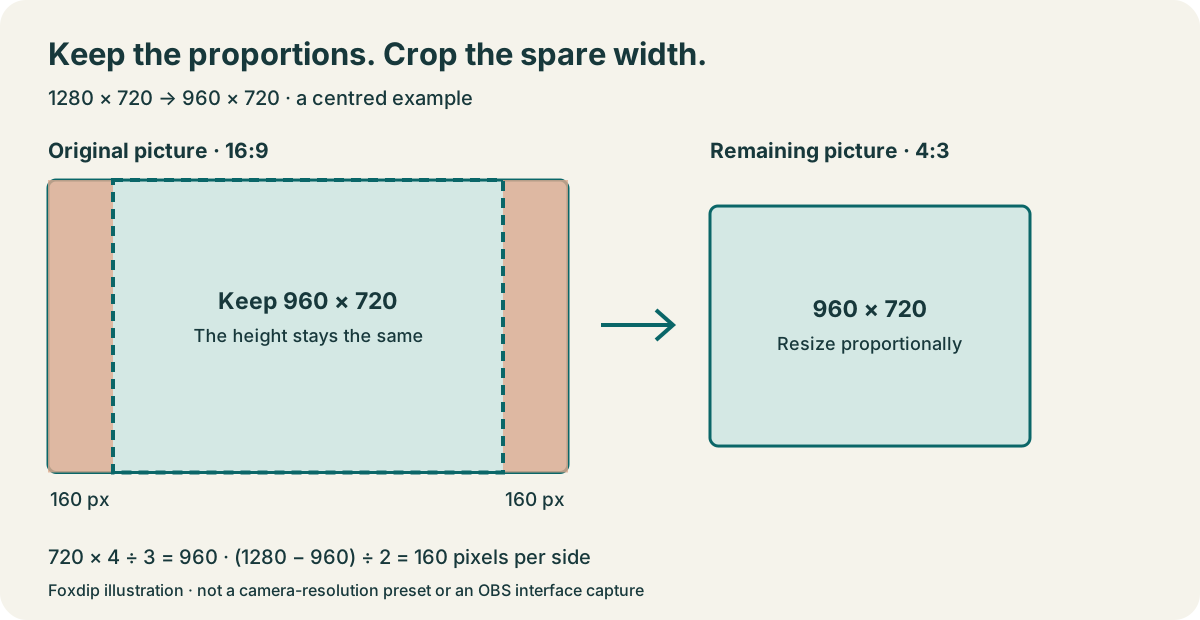
Illustration: this centred crop keeps the full height. Your camera position may call for an uneven left and right crop.
If the camera or frame disappears, check which one sits above the other. OBS Source Order: Learn Layers with Three Colour Blocks ↗
Use your own opening dimensions instead of copying the example. Work out an aspect ratio ↗
3. Crop first, then resize and move
Select the webcam. Hold Alt on Windows or Option on macOS and drag an edge inward: cropped edges turn green. For exact values, use Edit → Transform → Edit Transform, or Ctrl-E on Windows/Linux and Cmd-E on a Mac. Enter the crop first, then resize the remaining picture proportionally to fit the opening.
Work in that order: choose what stays in the shot, adjust its size, then move it into place. It’s easier to see whether your face is too large or simply off-centre when you aren’t changing all three at once. Avoid forcing the width and height independently to fill the gap.
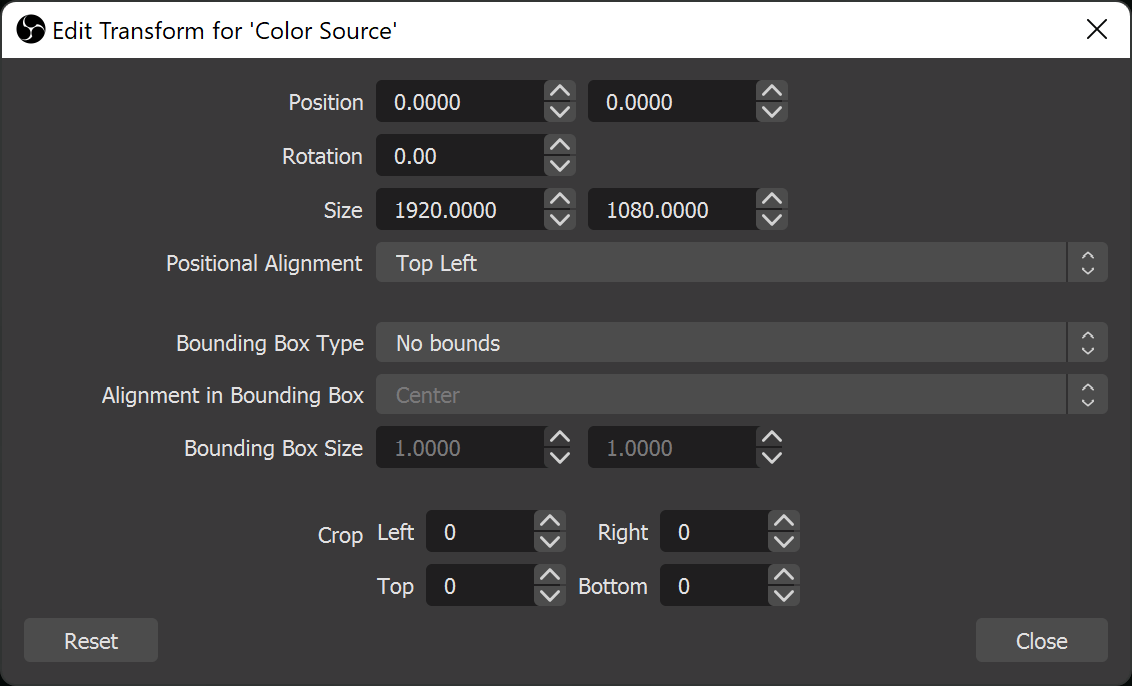
Edit Transform provides numeric controls for source size and cropping. This example edits a Color Source; your webcam uses the same transform dialog.
After cropping the camera, look at how it fits the whole scene. Stream Layout Readability: Can Viewers See What Matters? ↗
5. Put the border above the cropped camera
A PNG frame can have a transparent opening, but that opening doesn’t trim the webcam beneath it. Place the border above your cropped camera and check all four edges. Any camera image outside the opening still needs to be cropped or hidden.
A round camera window needs a different approach. OBS’s Image Mask/Blend filter can hide parts of the source, and an alpha-channel mask uses the mask image’s transparency. Use a mask designed for the shape you want; a rectangular crop alone won’t turn the picture into a circle.
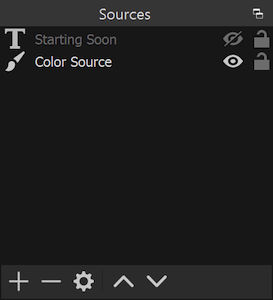
Sources near the top draw over the sources below. The eye control changes visibility; the plus button adds another source.
6. Move around before calling it finished
Record a few normal movements: look left and right, lean back and gesture if that’s how you stream. Play it at the size viewers will see. Check that your hair, chin and shoulders stay where you want them, and look for camera edges poking past the frame.
Switch to the other scenes that use the webcam too. If those still look right, keep the change. If the crop has become hard to untangle, note the current transform values, reset the affected item and rebuild the crop in your test scene one step at a time.
Still stuck?
Your face looks too wide or too tall.
Undo the uneven stretching. Keep the image in proportion and crop the excess instead.
The webcam spills past the border.
Measure the opening and crop the camera to it. The transparent part of a border doesn’t hide the image underneath.
The crop changed the camera in another scene too.
Check for a Crop/Pad filter on the shared source. Use a scene-item Transform crop when only this placement should change.
Sources & references
The crop, transform and mask controls follow OBS’s official guides linked below. November 2026 addition: documentation-based diagnostic examples; no new hands-on hardware result or platform upload test is claimed.
- OBS: Video Capture Sources ↗Checked 2026-10-18 · Published January 11, 2022
- OBS: Sources Guide ↗Checked 2026-10-29 · Published January 11, 2022
- OBS: Crop/Pad Filter ↗Checked 2026-11-04 · Published January 12, 2022
- OBS: Image Sources ↗Checked 2026-10-18 · Published January 11, 2022
- OBS: Image Mask/Blend Filter ↗Checked 2026-10-18 · Published January 11, 2022
- OBS — Aspect Ratio Guide ↗Checked 2026-11-04
Spotted something out of date? Let Alex know.
How we put our guides together ↗