
Lower input gain until your loudest reasonable reaction is clean. Use a compressor to reduce loud-to-quiet variation and a final limiter to catch remaining peaks.
Set input headroom first, then use compression for dynamics and a limiter for remaining peaks.
In this guide
Before you start
- Headphones, one microphone route and access to its hardware or software input gain.
- A note of current filters so you can restore them.
A damaged input stays damaged
Begin with the filters bypassed and record ordinary speech followed by a comfortably loud reaction. Do not shout painfully to manufacture a worst case. If the sound is already harsh at the microphone input, lower the input gain and repeat. A later limiter cannot reconstruct a waveform that clipped before it entered OBS.
Keep your usual mouth distance and angle. A filter tuned while you lean close can behave differently when you settle back to play. Save an untreated reference that contains a whisper, a sentence and a laugh; it will help you hear whether the processing makes the voice easier to follow.
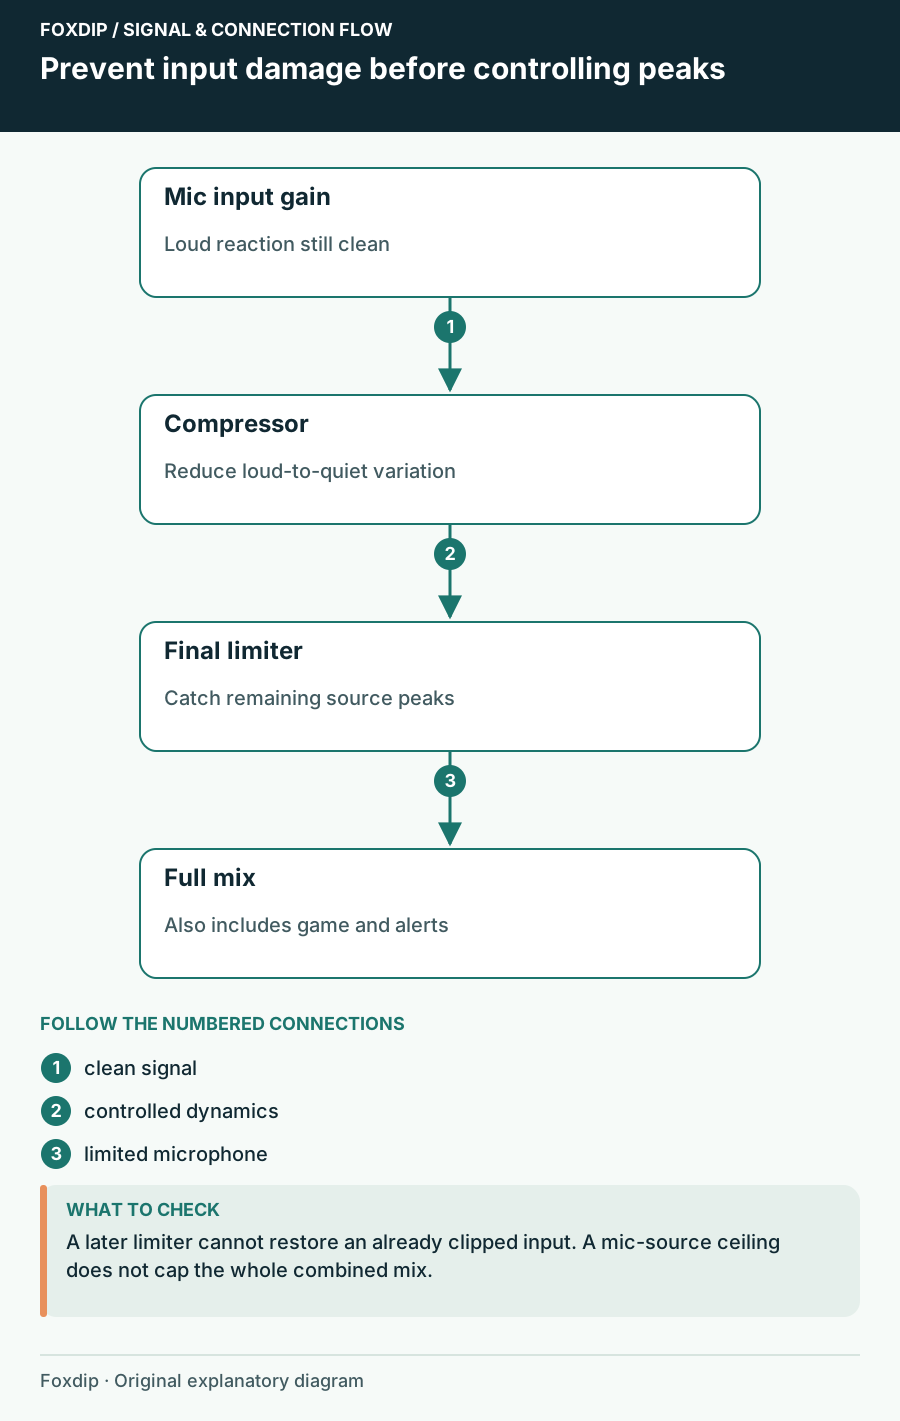
Original Foxdip schematic. Follow the labelled checks alongside the guide.
Use compression for the range you need
A compressor reduces material above its threshold. Ratio determines how strongly it reduces that excess; attack and release determine the movement. For a mathematical example, a 2:1 ratio turns 6 dB above threshold into 3 dB above threshold. That explains the control, not an ideal voice preset.
Start with modest compression. Set the threshold so louder phrases receive treatment while ordinary speech retains some expression. Increase the ratio only if those reactions still leap out. Listen for a squeezed or dull delivery before adding output gain; making the processed version louder can conceal an unhelpful setting.
Reserve the limiter for what remains
Place the Limiter last among the microphone filters. Choose a ceiling that leaves useful headroom in your mix; the documented default is -6 dB, not a requirement to fill the meter to that point. Lowering the ceiling does not make an already clipped input clean.
Compare the voice at similar loudness
Record the same phrase with the compressor bypassed and enabled, keeping playback volume comparable.
Look for: Quieter words remain readable while loud reactions feel less startling.
If the voice loses its shape, ease the ratio or threshold before adding gain.
Check the final ceiling
Enable the final limiter and repeat a loud reaction. Listen to the file, then inspect the source peak.
Look for: The remaining peaks are controlled without constant audible flattening.
If the limiter works on nearly every word, reduce gain feeding it or revisit the compressor.
Remember the other sounds in the mix
A limiter on the microphone controls that microphone source. Adding game, alerts and chat can still create a louder combined output. Leave room in each source and listen to moments where they overlap. An alert that sounds comfortable alone can be intrusive over a laugh and a game explosion.
Keep the microphone fader separate from the filter diagnosis. If your voice is simply too loud beside a quiet game, reduce its level or rebalance the game. Compression solves variation within the voice; it does not decide the audience’s preferred game-to-commentary balance.
Keep one repeatable voice check
Use the same short reference passage after a device update, a gain change or a move to another room. Compare ordinary speech, soft delivery and an excited reaction, then add the real game mix. Preserve the original clip so you can distinguish improvement from familiarity.
If you need increasingly aggressive processing to manage a changing speaking distance, fix the position first. Comfortable, repeatable placement gives compression a much simpler job and usually saves more time than cycling through presets.
Make the input more predictable before tuning dynamics. Keep a consistent speaking position ↗
Compare equal loudness before judging the compressor
A processed take can seem better simply because its output gain is higher. Record the same ordinary sentence and comfortable excited reaction with compression bypassed, then active. Compare at similar perceived playback loudness before deciding whether the processing improved the voice’s range.
Leave the limiter’s job separate from the comparison. If ordinary speech is constantly being pushed into its ceiling, inspect compressor output gain and the input level instead of lowering the ceiling again. A limiter is a final source safeguard, not evidence that the voice has been mixed well.
| Observation | Next change | Expected result |
|---|---|---|
| Processed version wins only when it is louder | Reduce the playback difference and compare again | Judge articulation and dynamics rather than volume alone |
| Normal speech repeatedly hits the limiter | Inspect output gain and the preceding level | Reserve limiting for the remaining peaks |
| Loud words were harsh with filters bypassed | Lower input gain before comparing filters | Start with an undamaged input signal |
Use the recorded filtered signal for this comparison, not a bypassing direct monitor. Direct Monitoring vs OBS Monitoring: Why Your Headphones Sound Different ↗
Sources & references
Based on official product documentation reviewed on 27 October 2026. Follow the recording checks below on your own setup. November 2026 addition: documentation-based diagnostic examples; no new hands-on hardware result or platform upload test is claimed.
- OBS — Compressor Filter ↗Checked 2026-11-04
- OBS — Limiter Filter ↗Checked 2026-11-04
- OBS — Audio Mixer Technical Details ↗Checked 2026-10-27
Spotted something out of date? Let Alex know.
How we put our guides together ↗