
A circular webcam needs a mask. A round border placed over a rectangular camera only decorates its edges; it does not hide the corners.
In this guide
Start with the camera, not the border
Put the camera in a spare scene and centre yourself before adding any artwork. You need two separate jobs: decide which part of the picture survives, then choose the border that sits around it. Keep the border hidden until the camera shape works on its own.
If your camera is wide, use a circle mask with that same wide canvas. Our 1280 × 720 example keeps a centred circle inside a transparent 16:9 image. You can move the camera composition or choose a different matching mask; stretching the source to fill a square changes faces as well as dimensions.
For a matching 16:9 source, use this original practice mask. Download the 1280 × 720 alpha mask ↗

Choose dimensions that match the camera or cropped source you actually have. Make a mask for another source size ↗
Add the mask as an effect filter
Open the camera filters
Right-click the intended camera source in the Sources dock and choose Filters. Add Image Mask/Blend in Effect Filters.
Look for: The filter belongs to the camera source you meant to change.
Choose the matching mask mode
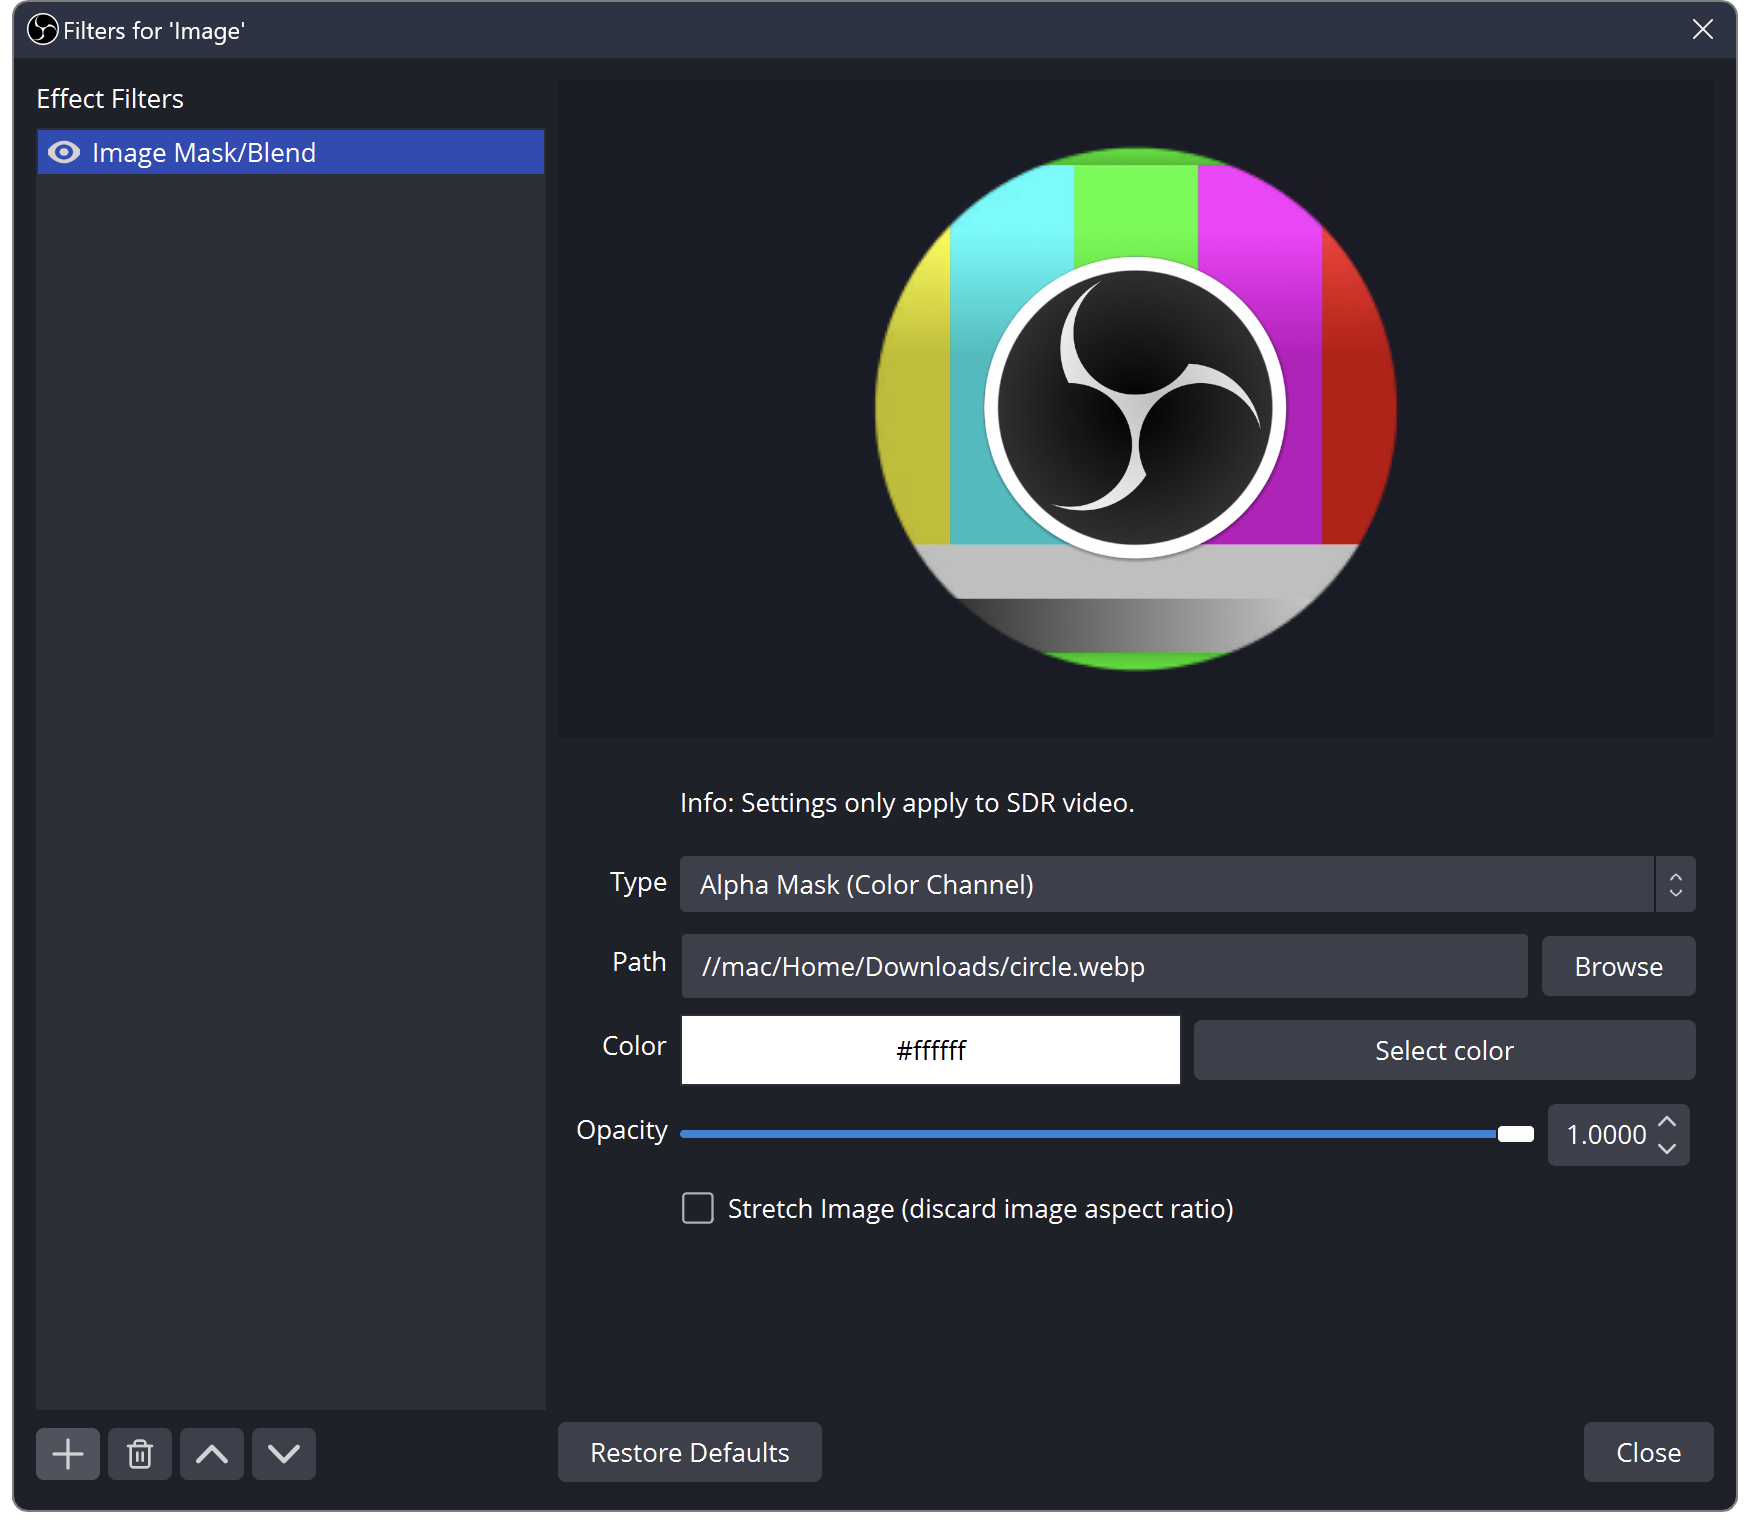
Browse to the downloaded PNG. Select Alpha Mask (Alpha Channel) for our transparent-outside example. Leave opacity at full strength while checking the shape.
Look for: The corners disappear and the circle remains visible.
The documentation image below shows Color Channel mode. Our PNG deliberately uses Alpha Channel instead.
Check the circle before decorating
Place a contrasting colour or scene behind the camera. Look at the full outline and your face while moving slightly.
Look for: The outline stays round, with no rectangular corners or distorted proportions.
 123
OBS documentation shows where Type and Path live. Select Alpha Channel for the transparent mask supplied here; the pictured example uses Color Channel.
- Mask mode
- Choose the mask PNG
- Preserve the mask ratio
If you really want a square source
A source-level Crop/Pad filter can make the picture square before the mask. For a 1280 × 720 camera, removing 280 pixels from each side leaves 720 × 720. Put that crop before the mask and use the 720 × 720 mask file. Those numbers apply to this example, not every webcam.
Source filters affect other uses of that same source. If the landscape scene needs its original wide camera, create an intentionally separate source or scene arrangement and verify the original after editing. An Alt/Option transform crop changes a scene placement; it is not interchangeable with a source-level crop before masking.
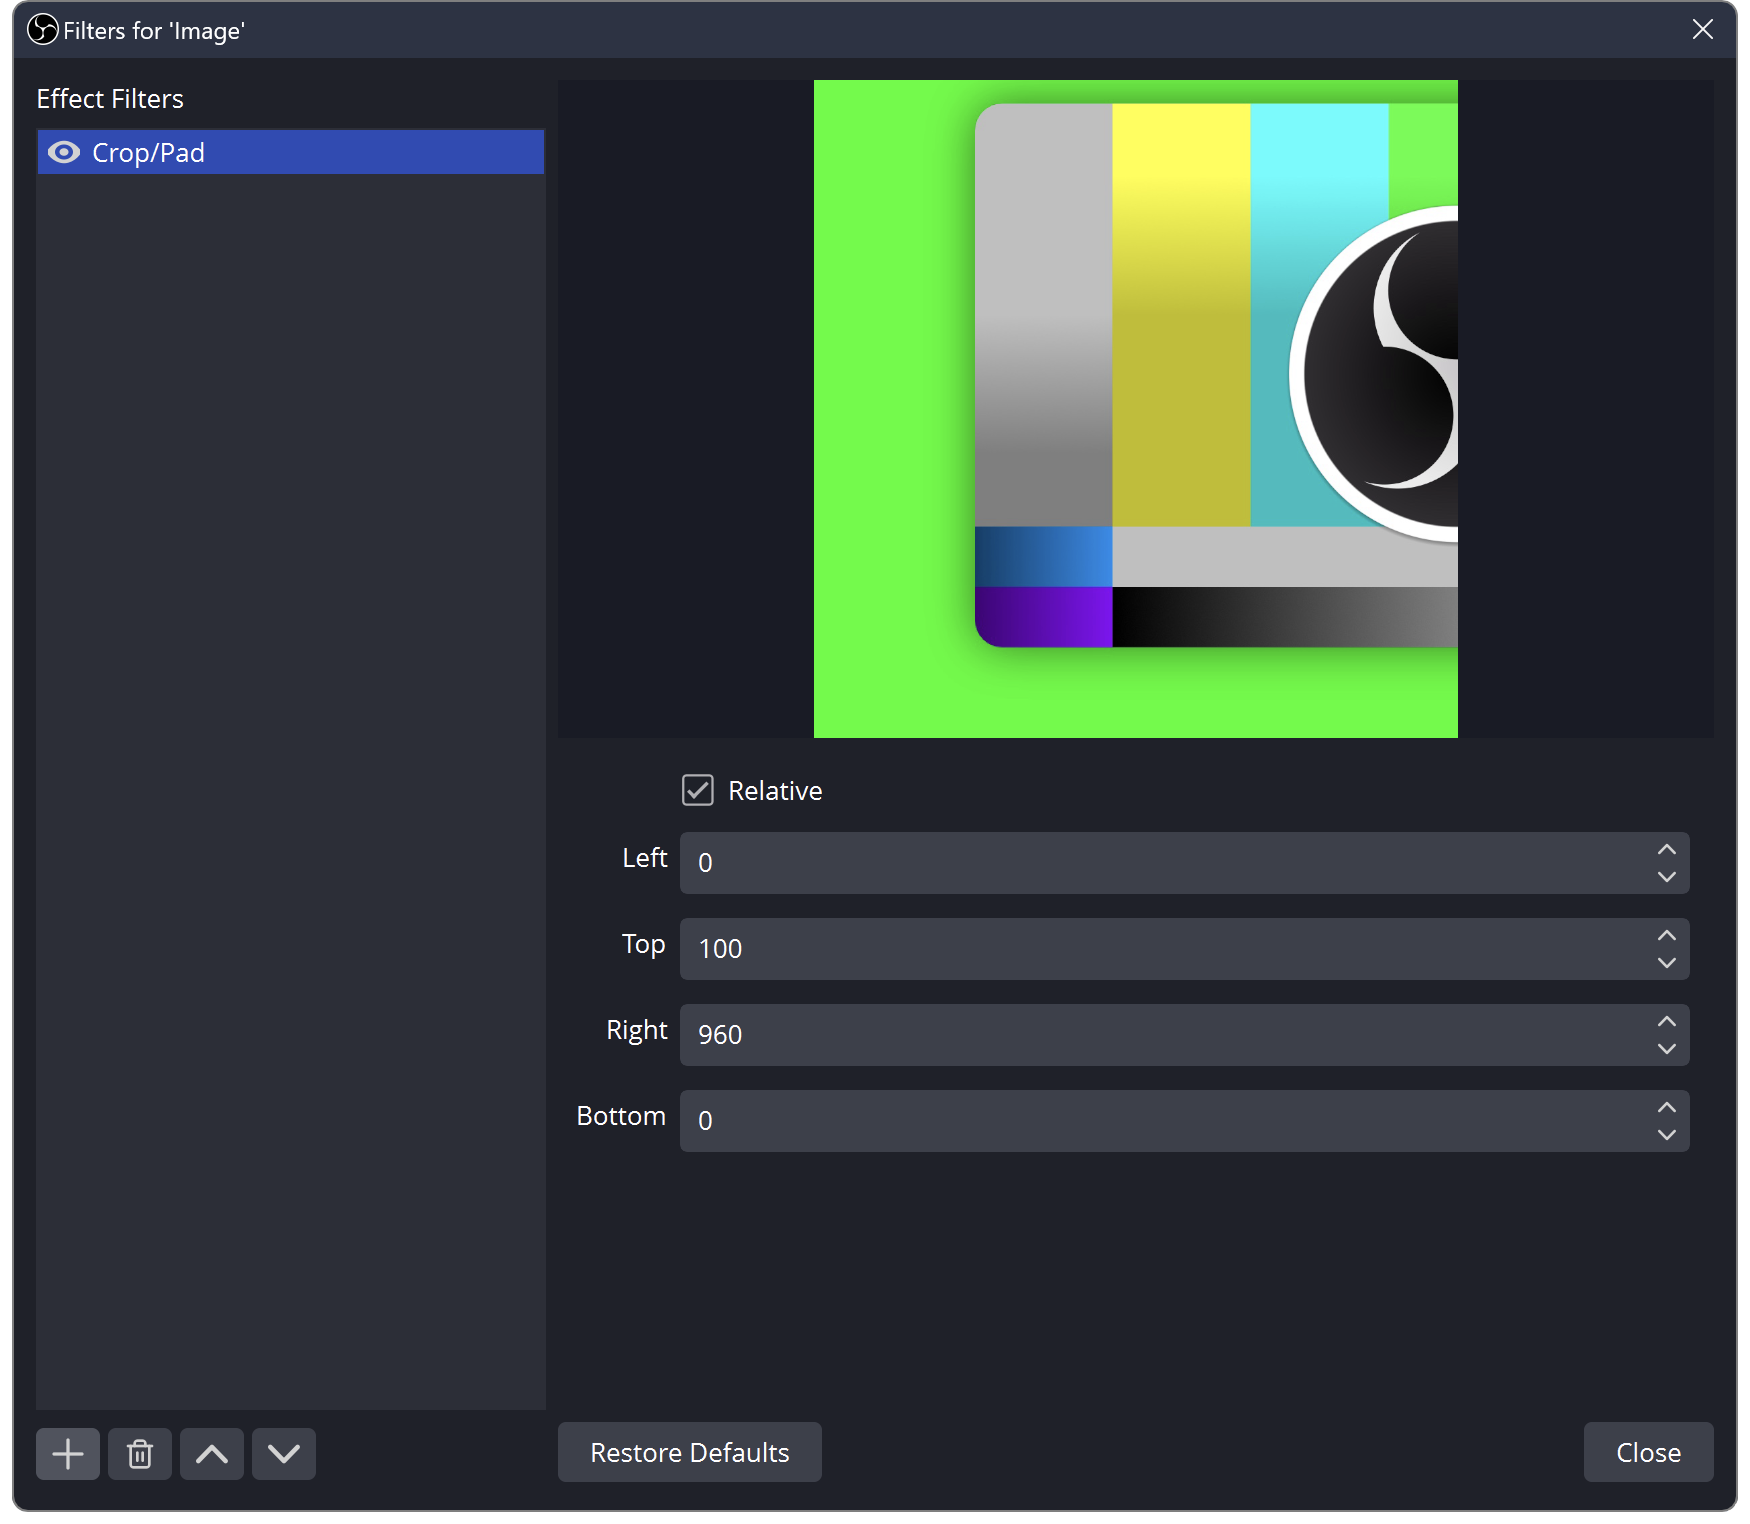
Crop/Pad changes the underlying source. Set its position before the mask and check every scene that reuses that source.
Use this after making the example source square. Download the 720 × 720 alpha mask ↗

Put the border on last
Show the decorative frame above the masked camera, then resize the composition proportionally. Check your eyes, hair and gestures at the final stream size rather than judging the full-screen preview alone.
If the result becomes an oval, compare the source dimensions, mask dimensions and Stretch Image option before changing the artwork. If the entire camera disappears, temporarily disable the mask, confirm the camera itself works, then check the chosen mask mode and file.
Use the existing placement guide once the mask itself is working. Fit your camera inside a frame ↗
Sources & references
Control names follow OBS’s Image Mask/Blend documentation. The supplied mask files are Foxdip originals with a transparent exterior and opaque circular centre.
- OBS — Image Mask/Blend Filter ↗Checked 2026-10-27
- OBS — Crop/Pad Filter ↗Checked 2026-10-27
- OBS — Filters Guide ↗Checked 2026-10-27
Spotted something out of date? Let Alex know.
How we put our guides together ↗