
Send an organised working copy with a short brief, the original media and the assets the editor is allowed to use. Keep your own originals intact.
Prepare a working copy, a matching caption file and a brief that identifies the intended edit.
In this guide
Before you start
- A copy of the original recording; keep your only source file unchanged.
Make a handover folder, not a scavenger hunt
Download the folder template and extract it into a new location. It creates seven folders for source media, audio, graphics, captions, project files, exports and reference. READ_ME_FIRST.txt gives you a short brief to fill in.
This template does not collect or upload anything. You choose which files to include and how to transfer them. Start by copying the recording into 01_SOURCE rather than moving the only copy from your archive.
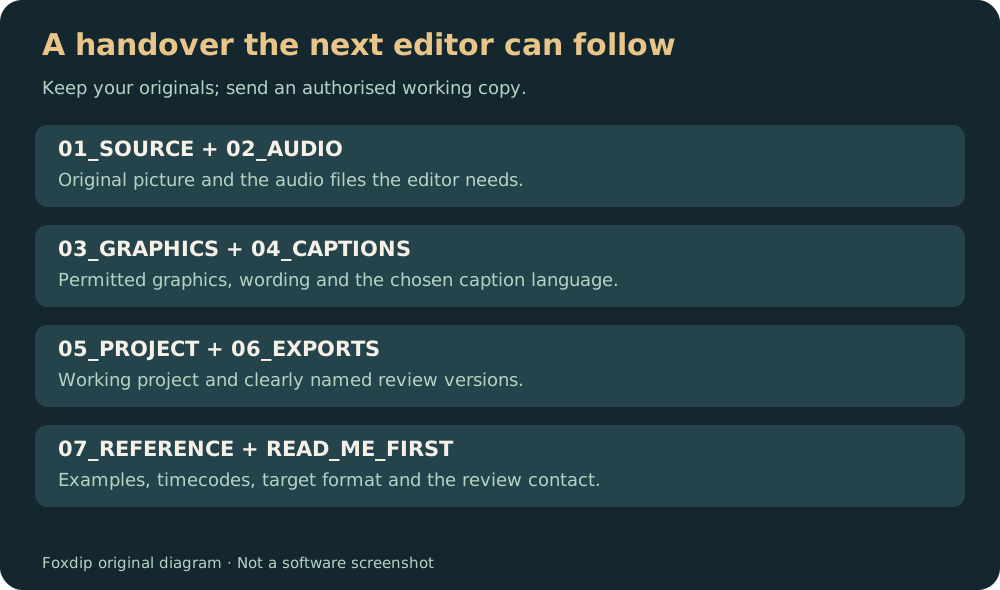
Original handover diagram. The accompanying ZIP contains the actual folder template.
The ZIP contains real folders, a brief and an example caption file. Download the editor folder template ↗
Fill in only the details the editor needs. Open the handover brief ↗
Write the brief before filling every folder
Name the target platform, aspect ratio, final length, language, deadline and review contact. Include two or three timecoded moments that explain the intended edit. A short note such as “keep the reaction at 03:12, then show the result at 03:18” gives the editor more direction than “make it pop”.
List required wording and anything that must not appear. Mention private overlays, an accidental notification or a section with uncleared music. The editor should not have to infer whether a graphic is approved simply because it was in the recording.
- Use an unambiguous deadline and timezone.
- Name the source file for each timecode.
- Identify the final language and caption master.
- Explain which version of the brief is current.
Include files that can be opened separately
Keep separate audio tracks or stems when you have them. Put the final caption master in 04_CAPTIONS and the correct graphics in 03_GRAPHICS. Include a readable note about permission where it matters.
Do not send browser cookies, access tokens, private chat logs or a random entire project archive. An editor needs the media and agreed instructions, not access to every account used to produce them. If a project file uses external media, keep the folder relationship stable and include the necessary authorised files.
Before uploading a large package, open a copy from the handover folder on your own machine. A project that only works because it finds files elsewhere on your computer is not yet a complete handover.
Use names that make reviews easier
Keep the source filename unchanged and use clear names for exports, such as stream-title-vertical-v01.mp4. Put feedback in one place with the export version and timecode. Tell the editor which comments are required changes and which are options.
A final glance through the archive catches surprisingly ordinary problems: the old captions, a missing sound file, two different logos, or an export called final that was never reviewed. Compare the inventory with the brief before sending.
After transfer, confirm that the recipient can open the intended files through the authorised channel. This guide does not assume a particular transfer service or send a file on your behalf.
Track which graphic belongs to which scene and whether it may be shared. Make an asset inventory ↗
Keep a timed text master when it will be useful for revisions. Choose the caption deliverables ↗
Sources & references
The downloadable exercise and its exports were generated and decoded with FFmpeg 6.1.1. Software and destination guidance comes from the linked primary documentation; this does not imply a live account upload or a hands-on test of a desktop editor.
- Blackmagic Design — official Resolve training ↗Checked 2026-10-27
- FFprobe — inspect media streams ↗Checked 2026-10-27
Spotted something out of date? Let Alex know.
How we put our guides together ↗