
Your mic sends sound on one channel only, so viewers hear you on one side. In OBS, open Advanced Audio Properties and turn on Mono for your mic only. Leave game and music in stereo.
- Click the gear icon in the Audio Mixer and open Advanced Audio Properties.
- Find your microphone in the list.
- Tick Mono (or Downmix to Mono) on that row only.
- Leave the balance in the middle.
- Don't tick Mono on your game or music. They should stay stereo.
- Record 20 seconds of talking and listen back with headphones.
Center a single voice without collapsing the stereo game mix.
In this guide
Before you start
- Headphones known to play both sides and a short recorded speech sample.
- Access to Advanced Audio Properties and, for an interface, its input-routing controls.
Rule out a listening-only problem
Play a familiar stereo file and confirm both headphone sides work. Then play your OBS speech recording on another known stereo device if available. If every sound is missing from the same side, inspect the headphone connection, adapter and listening balance before changing the microphone.
A mono microphone is normal for one voice. OBS can place a true one-channel input in both output channels automatically. The troublesome case is often a two-channel device carrying the microphone only on input 1, which becomes the left channel of a stereo pair.
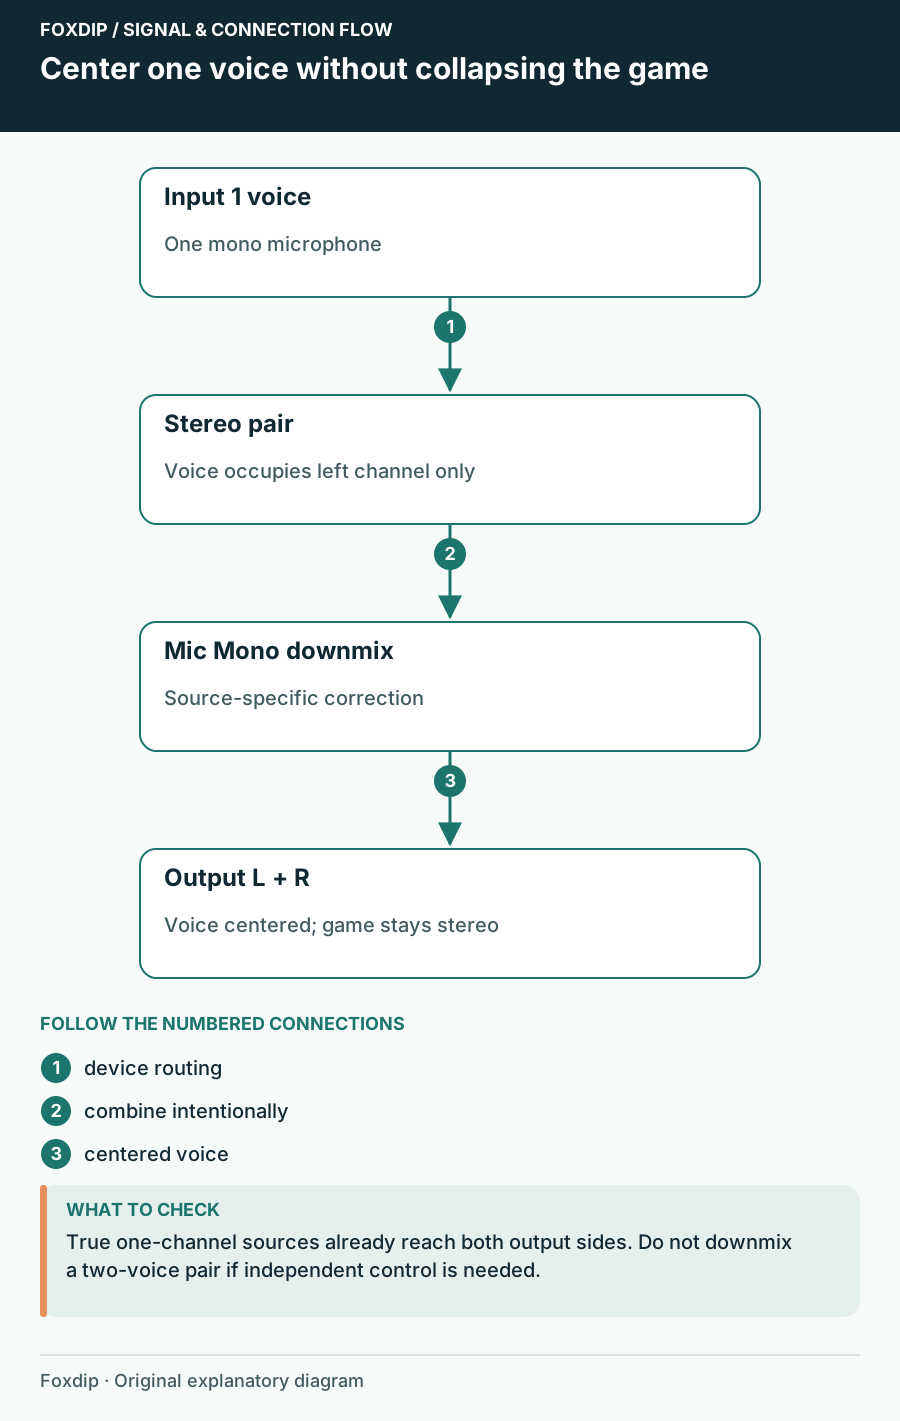
Original Foxdip schematic. Follow the labelled checks alongside the guide.
Do not centre two people by accident
Before enabling Mono, ask what lives on the other input. Speak into the first microphone alone, then have the second person speak alone if another input is connected. Record the pair unchanged and inspect left and right separately. One empty side and two different voices lead to different decisions.
For one voice carried on one side of a stereo input, mono downmix can centre the source. For two people, summing the pair removes the channel separation you might need later. Choose the intended recording arrangement first, then verify a spoken phrase alongside a known stereo game sound.
| Observation | Next change | Expected result |
|---|---|---|
| One voice on the left and no intended right-side source | Compare Mono on that voice source only | The voice becomes centred without collapsing game stereo |
| A different person occupies each side | Plan independent input routing or preserve the pair for editing | Do not discard the separation unintentionally |
| Every source loses the same headphone side | Check listening hardware and balance | Avoid altering valid recording channels |
Plan how two hosts will be captured before combining their inputs. One Microphone or Two for a Two-Person Stream? ↗
Read the microphone’s two meters
Speak while watching only the microphone row. If two channel bars are present but only the first responds, you have a useful clue. Check that the source is the intended microphone or interface rather than a loopback mix. Write down its current channel and balance choices before changing them.
An interface with two physical inputs does not automatically make one connected microphone a stereo recording. Conversely, a stereo microphone, instrument or two-person setup may contain different material on both sides. Do not combine those inputs until you have decided what each one represents.
Center only the voice source
Enable source mono
Open Edit → Advanced Audio Properties. On the affected microphone row, enable Mono or Downmix to Mono, according to the displayed wording, and leave its balance centered.
Look for: A new recording presents the voice in both headphone sides.
If it remains one-sided, check the playback device and whether you changed the correct source.
Keep the game separate
Confirm the game and music rows have not been downmixed as part of the microphone fix.
Look for: Game stereo direction remains available while the voice is centered.
Undo changes on unrelated sources and repeat a left/right game check.
When an interface contains two voices
If input 1 is your mic and input 2 is a guest, downmixing the whole stereo pair combines both voices. It does not create independent faders. For separate control, use a manufacturer-supported routing arrangement that exposes the inputs as the sources you need, then set each voice appropriately.
Avoid building two identical captures of the entire pair and assuming each contains only one input. A label such as Guest does not remove your microphone from that device. Verify the result with each person speaking alone and inspect all recorded tracks. Keep the combined route until the replacement has been proven.
Listen to a speech and stereo check together
Record a centered spoken phrase, then a game event that moves from left to right. You should hear stable voice placement and a changing game position. If the voice becomes unexpectedly quiet after downmix, adjust its level after checking for cancellation or an upstream routing mistake; do not immediately add a large gain boost.
Keep your input plan with the scene collection. The next time you plug in a different interface or select a stereo loopback endpoint, repeat the channel check. A working headphone mix and a working recording can follow different routes, so assess both.
A track selection issue can disguise an otherwise correct channel fix. Check which track a player is using ↗
Sources & references
Based on official product documentation reviewed on 27 October 2026. Follow the recording checks below on your own setup. November 2026 addition: documentation-based diagnostic examples; no new hands-on hardware result or platform upload test is claimed.
- OBS — Audio Mixer Guide ↗Checked 2026-11-04
Spotted something out of date? Let Alex know.
How we put our guides together ↗