
Put the complete listening mix on track 1, then assign mic, game and chat to separate tracks. Enable all those tracks in recording output and verify them in an editor.
Create a playable full mix and isolated editing tracks without confusing tracks with audio channels.
In this guide
Before you start
- Separate microphone, game and voice-chat sources already working.
- An editor that exposes multiple audio streams, plus space for a check recording.
Give every track a purpose
A stereo track can contain left and right audio channels. A second recording track is a different stream, not the right ear of the first. Keep that distinction in mind when your editor shows several audio items from one video.
Use a small routing plan before clicking boxes. Track 1 is the review copy with everything audible. Track 2 is your microphone, track 3 the game and track 4 consenting voice chat. Leave unused tracks alone. You can rebalance isolated material later while retaining an easy file for ordinary playback.
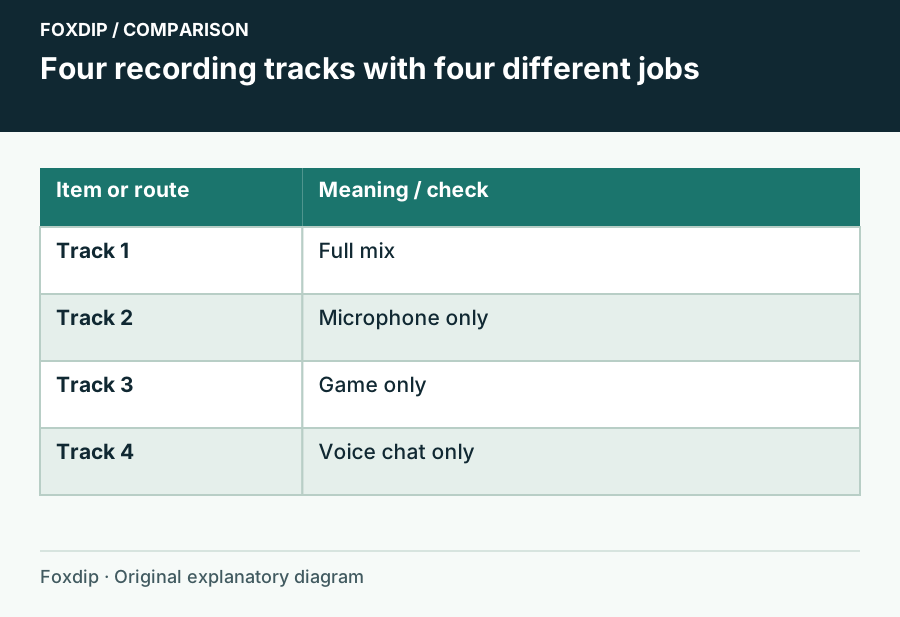
Original Foxdip schematic. Follow the labelled checks alongside the guide.
Build the assignment matrix
Open Edit → Advanced Audio Properties. Assign sources according to the plan, then inspect every row rather than only the microphone.
| Source | Track 1: full mix | Track 2 | Track 3 | Track 4 |
|---|---|---|---|---|
| Microphone | Yes | Yes | No | No |
| Game | Yes | No | Yes | No |
| Voice chat | Yes | No | No | Yes |
Enable the tracks in the file
Assignments alone do not make OBS write every track. In Settings → Output, select Advanced output mode and the Recording tab. Use a recording format that supports the chosen streams, such as MKV, and enable tracks 1–4 for recording. Name the audio tracks where your output controls allow it.
Note the streaming track separately if you are broadcasting at the same time. Changing recording checkboxes should not become an accidental change to what live viewers hear. If Twitch VOD routing also uses a track, draw a combined plan before assigning the same number two different jobs.
Record distinct markers
Speak Mic only while game and chat are quiet, trigger a game sound while you stay quiet, then ask the consenting caller to say Chat only.
Look for: The file contains three moments you can recognize without guessing.
If overlap makes the check unclear, repeat with more silence between markers.
Inspect streams instead of trusting the player
Open the check in your editor and reveal its audio streams. Solo each one. Track 1 should have the full sequence; each isolated track should contain its own marker and no other electronic source. A microphone may still pick up keyboard or speaker sound acoustically, which track routing cannot remove.
Many ordinary players play one audio stream at a time. Hearing only your voice in such a player may mean it selected the mic stream, not that OBS lost the game. Select the full-mix track or inspect the file in the editor before changing the OBS configuration.
Make the edit without doubling the mix
When editing from isolated tracks, mute the full-mix track. Otherwise the full mix plus its isolated sources plays the same material twice. Keep the review track available as a reference, especially when you need to check the original relative timing.
For a longer project, note the track plan alongside the recording folder and use the same assignment across scenes. Test after adding a new source: newly created audio is easy to leave on every track. A ten-second marker check can save you from discovering the mistake after an entire session.
Separate a player-track selection issue from missing captured audio. Check a recording that seems silent ↗
Keep the live/VOD plan from colliding with editing tracks
If Twitch VOD routing is enabled, do not reuse the same track number for two incompatible purposes. For example, a track reserved for a VOD mix cannot simultaneously be a microphone-only editing stem unless those contents are intentionally identical. Write each output’s role beside its number before checking source boxes.
After recording the marker sequence, solo every enabled audio stream in the editor and compare it with that written plan. Keep the plan in the recording folder so another editor can distinguish the review mix from isolated material without guessing.
| Observation | Next change | Expected result |
|---|---|---|
| Track 2 was both “VOD mix” and “microphone only” | Allocate distinct track roles within the available tracks | Each enabled track has one clear content definition |
| A new alert appears in every isolated stem | Inspect that new source’s track assignments | Only intended tracks contain the alert |
| Editing isolated tracks makes the mix louder twice | Mute the full review mix while combining stems | Use either the reference mix or the isolated reconstruction |
Define the VOD feed before allocating the remaining editing tracks. Keep Music Out of a Twitch VOD with OBS Audio Tracks ↗
Sources & references
Based on official product documentation reviewed on 27 October 2026. Follow the recording checks below on your own setup. November 2026 addition: documentation-based diagnostic examples; no new hands-on hardware result or platform upload test is claimed.
- OBS — Multiple Audio Track Recording Guide ↗Checked 2026-11-04
- OBS — Standard Recording Output Guide ↗Checked 2026-10-27
- OBS — Twitch VOD Track Guide ↗Checked 2026-11-04
Spotted something out of date? Let Alex know.
How we put our guides together ↗