
Washed-out colour happens when an HDR picture gets shown as SDR somewhere along the way. First decide if you want an HDR or a normal (SDR) video. Then make OBS, the encoder and your video player all match that choice.
- Decide first: HDR file, or normal SDR video for YouTube and Twitch?
- If you want SDR, turn off HDR in Windows or the game while you record.
- If you want HDR, set OBS colour to Rec. 2100 (PQ) and pick a 10-bit encoder.
- Play the file in an HDR-capable player before judging the colour.
- Change one setting at a time and record a short test each time.
- Don't fix it with saturation. That hides the real problem.
Decide between HDR output and SDR delivery before changing contrast or saturation.
In this guide
Before you start
- An HDR source and a display/playback route appropriate to the result you want.
- A duplicated OBS profile and a short scene with bright highlights, faces and dark detail.
Decide what the final viewer receives
A source can be HDR while the final video is SDR. That requires tone mapping at a known stage. A fully HDR recording needs compatible capture, composition, encoding and playback. Turning up saturation on a mismatched pipeline can make one preview more pleasing while leaving the actual interpretation wrong.
Write down source HDR state, source colour-space setting, OBS output colour settings, encoder and playback device. Keep a known SDR file for comparison. If the file is wrong only in one player, investigate that interpretation before changing a capture that looks correct elsewhere.
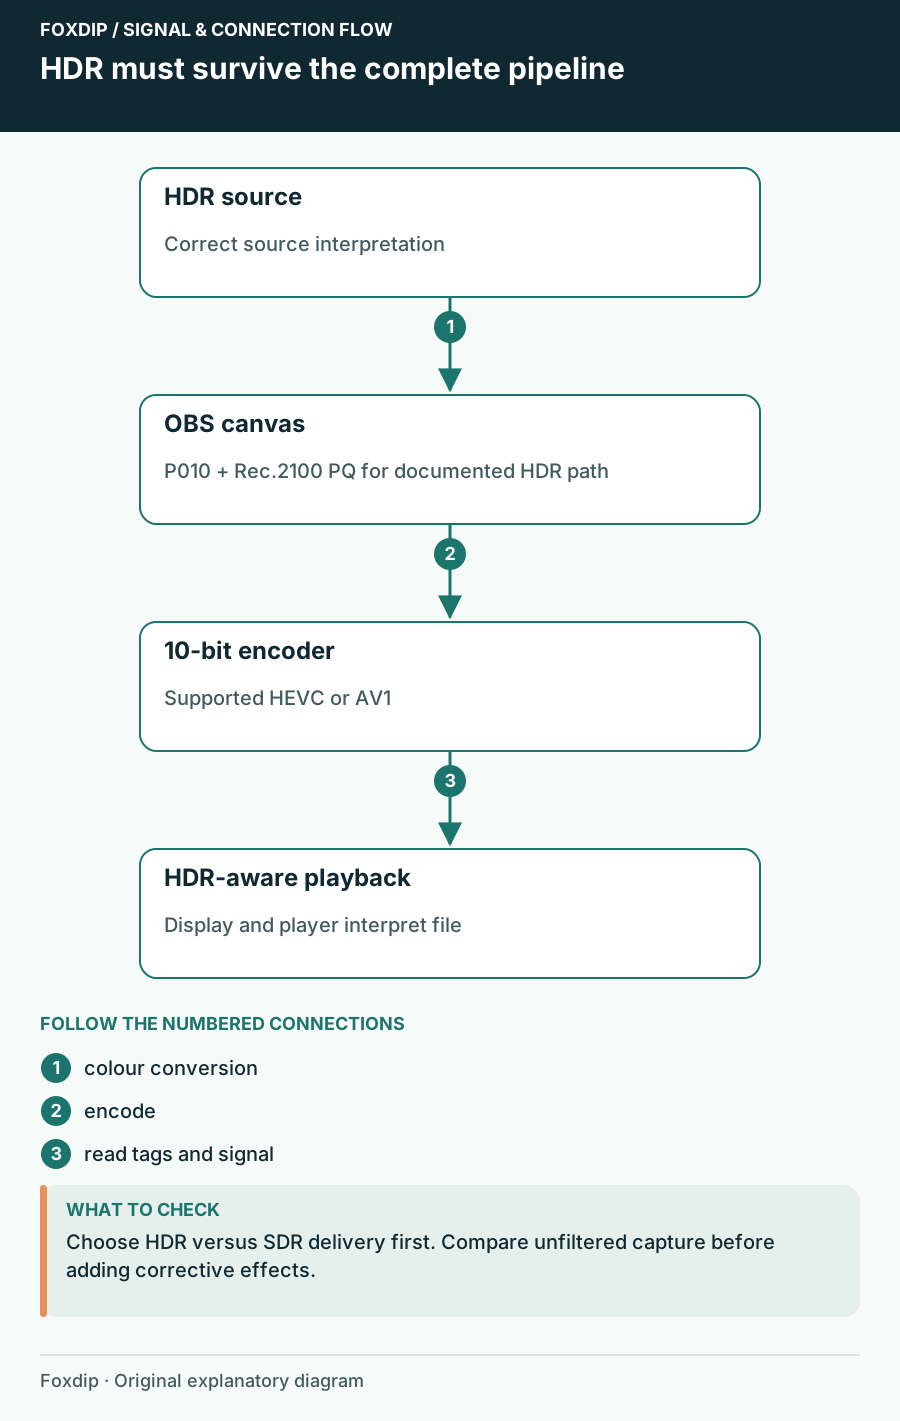
Original Foxdip schematic. Follow the labelled checks alongside the guide.
Use one scene to locate where colour first changes
Make a clean test scene with the HDR source and no optional effects. Record a short passage containing both a bright highlight and midtone detail. Compare that same time position in the intended HDR playback path, then add one effect or export stage at a time. Keep the clean file as the reference.
Use the current OBS HDR recording configuration only for an HDR destination. A deliberately tone-mapped SDR delivery is a different target. Repeated saturation adjustments cannot establish that source interpretation, canvas colour space, encoded bit depth and player interpretation agree.
| Observation | Next change | Expected result |
|---|---|---|
| Clean recording looks right; an effect changes the highlight | Inspect that effect’s HDR behaviour | Locate the first altered stage |
| The same file differs between players | Check their HDR/tone-mapping interpretation | Avoid changing capture to compensate for one viewer |
| Only the edited export changes | Compare project interpretation and export colour settings | Repair the export stage while preserving the source |
| The destination requires SDR | Use a deliberate SDR/tone-mapped path and inspect that output | Deliver the intended signal rather than an accidentally acceptable preview |
Check codec/bit-depth support if the HDR encoder cannot start. OBS NVENC Fails to Start Recording: Read the Specific Error ↗
Follow the current OBS HDR configuration
The OBS HDR guide updated in September 2026 specifies P010, Rec. 2100 (PQ) and partial range for the documented HDR recording path. It also specifies the game capture colour-space setting and a 10-bit HEVC/H.265 or AV1 recording encoder, using Main10 where offered.
The range control may be described as partial or limited in an interface or guide. Match the intended video range consistently rather than treating full as a quality upgrade. Check the GPU’s codec capabilities too: selecting an encoder name does not add support that the hardware lacks.
Build the HDR check profile
Duplicate the working profile and follow the OBS HDR guide for colour settings, source interpretation and a supported 10-bit recording encoder.
Look for: A short HDR sample records successfully.
If the encoder rejects the settings, check hardware capability before adjusting colour by eye.
Inspect every conversion point
OBS documents automatic conversions when source and canvas colour spaces differ. Filters and transitions can also affect the path, particularly third-party components whose HDR support is uncertain. Compare a clean capture scene with the same scene after its effects are enabled.
If an unfiltered recording looks correct but adding an effect changes brightness or highlight detail, investigate that effect’s HDR support. Avoid stacking corrective filters to compensate for a conversion you have not located. Keep the unfiltered sample so you can distinguish an intentional artistic grade from a technical interpretation error.
Evaluate through the intended playback route
Play the sample in an HDR-capable player on an HDR-enabled display, then inspect its interpretation in the editor. Check highlight detail and skin tones as well as overall brightness. An SDR screenshot of an HDR preview is not a reliable representation of what the HDR file contains.
For SDR delivery, compare a deliberate SDR workflow using the appropriate tone mapping. Do not upload an HDR-tagged file merely because it looks acceptable in a player that happens to tone-map it. Your output should describe the signal you actually intend viewers to receive.
Change one stage at a time
If the image is washed out from the first capture preview, begin with source interpretation. If the preview is reasonable but the exported file is wrong, inspect output metadata, codec and player. If only an edited export is wrong, check the editor’s project and export colour management.
Keep both the original capture and small comparison exports. Once a path works, note the exact source mode and destination. Recheck when moving from a local HDR archive to a service with different support; a successful local file does not establish that every streaming destination will handle it identically.
When the editor is where the picture first changes
Keep three comparisons separate: the original capture in an appropriate player, the editor preview, and a short exported file opened in that same player. If only the editor preview differs, inspect its interpretation before changing the original OBS capture.
If the editor preview is right but its export changes, inspect the export’s intended colour space and metadata. Keep one known original frame and the matching time position available so you are not comparing different moments. An SDR screenshot of an HDR viewer remains an unreliable reference.
Blackmagic’s training index has a dedicated colour-management lesson. Use the current documentation for your exact editor and version rather than assuming that the name of a project setting is the same across releases.
Sources & references
Based on official product documentation reviewed on 27 October 2026. Follow the recording checks below on your own setup. November 2026 addition: documentation-based diagnostic examples; no new hands-on hardware result or platform upload test is claimed.
- OBS — HDR Configuration ↗Checked 2026-11-04
- OBS — High precision color spaces (including HDR) ↗Checked 2026-10-27
- NVIDIA — Video Encode and Decode Support Matrix ↗Checked 2026-10-27
- Blackmagic Design — official Resolve training ↗Checked 2026-10-27
Spotted something out of date? Let Alex know.
How we put our guides together ↗