
Label both ends, record the working setup, then route one cable at a time. Leave room for normal movement and keep connectors reachable. Play back a second recording before fastening the finished arrangement.
Cables you can trace and reach, with enough slack for the equipment to move and a recording that confirms everything still works.
In this guide
Before you start
- The devices you use during a normal stream.
- Connection instructions for the exact device models.
- Temporary labels and reusable ties if you have them.
- A recording from the working setup before you move anything.
Label both ends before anything disappears under the desk
Give every device a row on a sheet of paper. Write where it plugs in now, which cable or adapter it uses and whether you unplug it regularly. Take a photo or draw the working arrangement before moving anything. When several leads look alike behind a monitor, that small record makes reconnecting them much less of a guessing game.
Then label both ends with the same short device name. Keep charging leads separate from the connections that stay in place for the stream. You can do this with the setup you already have; a cable tray can wait. If you’re still deciding where the equipment belongs, work through the 100 cm desk layout first.
- Use the same label at both ends of a cable.
- Mark compatibility questions to look up before changing the connection.
- Keep occasional charging leads easy to identify and remove.
| Device | Where does it connect? | Keep within reach | Look up before changing |
|---|---|---|---|
| Microphone or interface | Write the exact computer port/path | Input control and both cable ends | Direct connection, hub and cable guidance |
| Headphones | Write the physical output | Volume control and removable plug | Correct output and any adapter |
| Webcam or capture device | Write the current path | Port used during troubleshooting | Connection and compatibility instructions |
| Keyboard and mouse | Write their current paths | Usual movement and charging needs | Any receiver or charging cable |
| Monitor and power leads | Write both destinations | Controls and normal access | Condition and manufacturer routing guidance |
Check the device instructions before adding a hub
Count the computer ports and read the cable, adapter and hub guidance for each exact device. If a microphone needs a direct connection, reserve that port while the cables are still easy to rearrange. A plug that fits gives you only part of the answer; the device still needs a connection it supports.
Audio-Technica tells AT2020USB-X users to use the included cable without a USB hub or extension. Focusrite prefers a direct computer connection for its USB interfaces, while its guidance discusses a powered hub and compatibility testing where a hub is necessary. Follow the instructions for your own hardware rather than borrowing a recommendation from a different device.
Keep the known-working connection until any missing compatibility detail is resolved. If you need to ask the manufacturer, include the exact device, cable and proposed hub or adapter. That gives you a useful question to settle before the lead is fastened behind the desk and awkward to swap.
Check that the arm can reach and park before fastening its cable. Will a Microphone Arm Fit Your Desk? Check Before You Buy ↗
Save a quick “before” recording
Open the normal scene, apps and connected devices. Record yourself talking, typing and using the mouse, with the camera or capture source running if you use one. Stop and play the file, then save it as “before routing” with a note of the connections. Make sure the file itself contains what you expect before using it as your reference.
If the current setup drops out or loses a source, solve that before bundling the leads. Otherwise you may finish the desk and still have an unreliable connection tucked out of reach. The reference recording lets you compare the same actions afterwards and hear whether tidying introduced a change.
If an overlay file also goes missing, check its folder location and OBS source path. OBS Media Source not playing or looping: a local-file checklist ↗
Leave slack for the movement you actually make
Move one labelled cable to the proposed route, keeping the fastening temporary. Swing the microphone between its usual positions, bring the keyboard forward and sit or stand as you normally would. With an adjustable desk, follow its movement instructions and check the full intended travel before securing the cables. Watch the connectors while the equipment moves.
Keep both ends reachable enough to reseat or replace a lead without dismantling everything. Use reversible fastening while you try the route. A little visible slack can be useful if it lets the microphone park properly or the desk move freely. Choose a route that works during those movements, then tidy the extra length.
Inspect the cables and keep your walking area clear. CCOHS flags uncovered leads as trip hazards and damaged wiring as a concern. Stop using damaged electrical equipment and address it rather than hiding it in a bundle. Follow the product instructions when adjusting power connections, then return to the routing once the equipment is suitable to use.
- Does any normal movement pull a connector?
- Can the microphone return to its speaking and parked positions?
- Can you identify and reach both cable ends?
- Is the floor path you use clear?
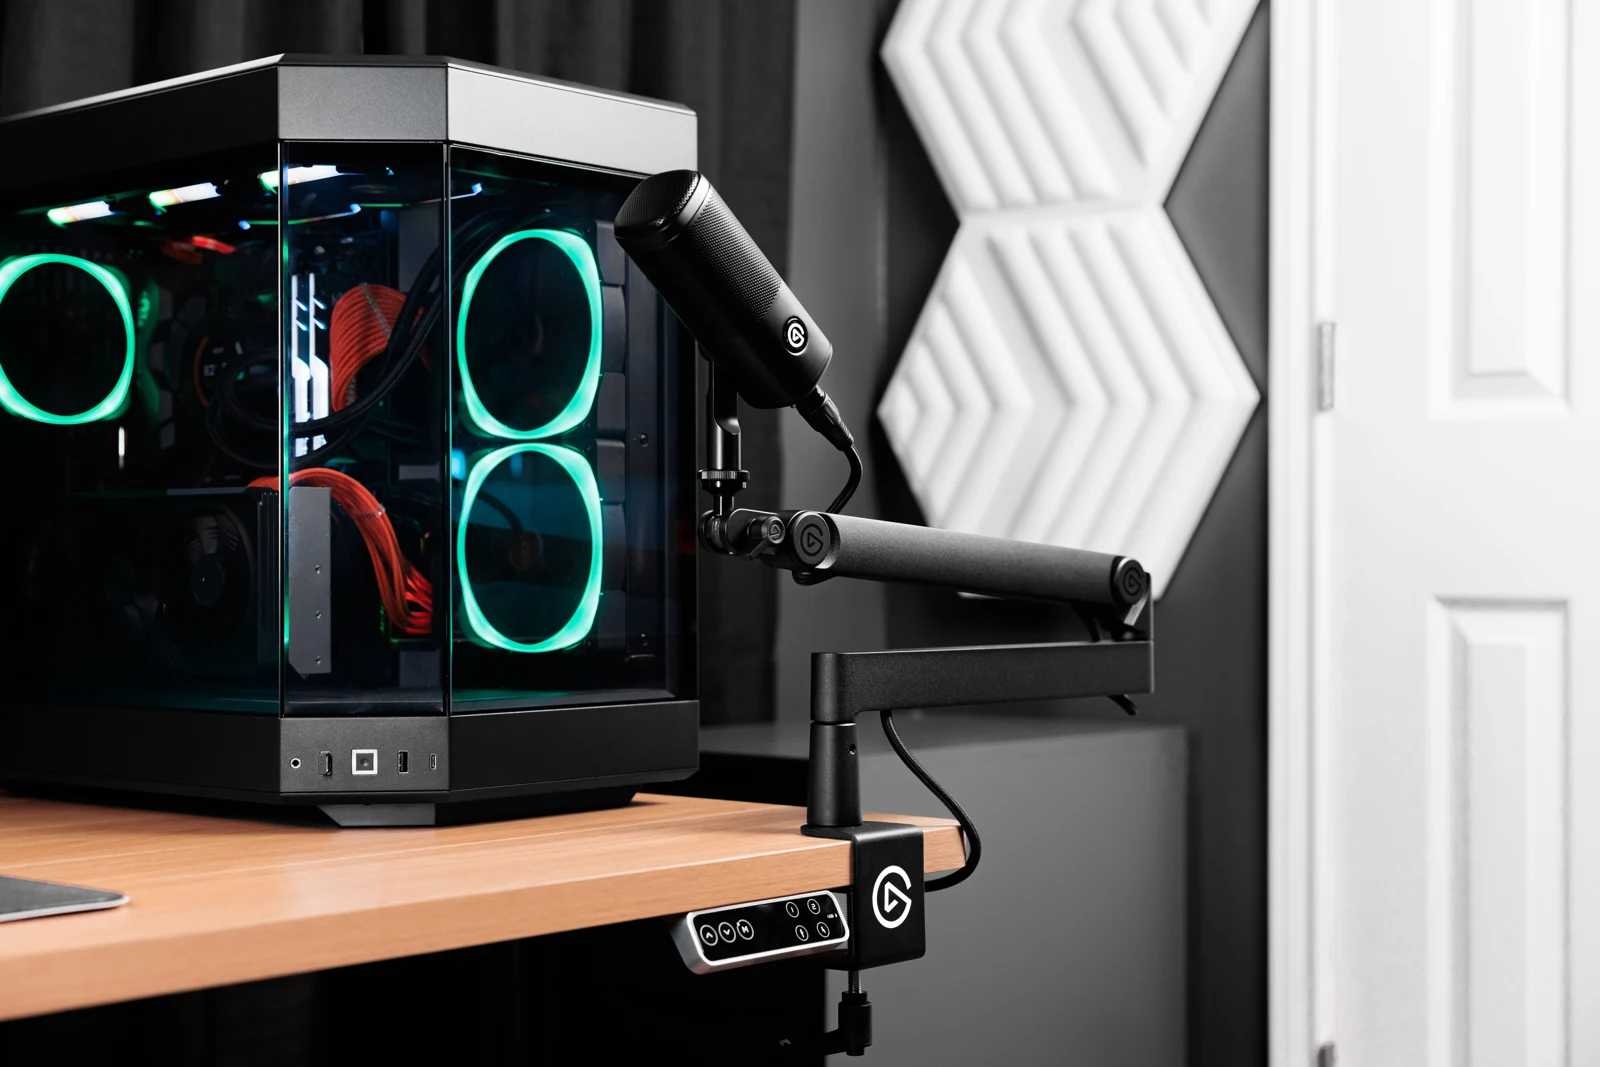
This official desk photo shows a cable following a mounted arm. Keep enough slack at the moving joints; the photo is an example, not a measured routing plan for your desk.
Record again before calling it finished
Repeat the recording with the same devices and movements, then listen and inspect the video. Check the camera, capture source and audio you included in the first file. A device appearing in a settings list is useful, but the recording shows whether it did its job while the setup was in use.
If you get a new dropout, missing source or disconnection, put the last moved cable back on its previous working route and repeat the check. Change one thing at a time so the result tells you something. Use the affected device’s troubleshooting instructions before adding another adapter or ordering a replacement.
Once everything works, update the map with the final ports and routes. Keep it beside the reference recording for the next device change. You should be able to find the microphone cable, disconnect it and replace it without unwrapping the whole desk. That is a useful kind of tidy.
Label the function at both ends
A cable label should distinguish power, data and signal direction. “USB-C” describes a connector and leaves the important part unanswered. Use names such as camera-to-PC, capture-to-PC and light-power, then record which host port each one uses. Photograph the working arrangement before bundling it.
After one cable change, activate every normal source. If a camera works alone but fails when capture starts, put the original cable and port back first. That restores a useful baseline without assuming the tidy arrangement has enough shared bandwidth.
| Observation | Next change | Expected result |
|---|---|---|
| Device powers on but never appears in software | Check documented data-cable and host-port requirements | Device detection is tested separately from power |
| Failure begins only when the second video source activates | Restore the known port map and add sources one at a time | Identify the change linked to the failure |
| Signal fails as the arm moves | Remove cable tension and inspect the connector path | Movement no longer disturbs the connection |
Use the topology check when several active devices share a hub. USB Hubs for a Mic, Webcam and Capture Card: Power or Bandwidth? ↗
Still stuck?
The microphone drops out after I move it to a hub.
Restore the last working connection, then check the exact microphone or interface instructions for hub support. Continue with this guide ↗
The mic works until I swing the arm aside.
Move the arm slowly through the full route and check for tension at each connector before fastening the cable. Continue with this guide ↗
The desk is tidy, but I can’t find the microphone cable.
Label both ends and update the map. Keep that lead accessible enough to replace on its own.
Sources & references
Device connection advice and cable checks use manufacturer and CCOHS guidance checked on 18 October 2026. November 2026 addition: documentation-based diagnostic examples; no new hands-on hardware result or platform upload test is claimed.
- Focusrite: What USB cable can I use with my USB interface? ↗Checked 2026-10-18
- Audio-Technica AT2020USB-X user manual ↗Checked 2026-10-18
- CCOHS: Office safety — general ↗Checked 2026-10-18 · Published March 30, 2023
- Microsoft Learn — USB bandwidth allocation ↗Checked 2026-11-04
Spotted something out of date? Let Alex know.
How we put our guides together ↗