
The receiving channel owner should inspect incoming raid limits and any temporary raid pause before the sender tries again.
Separate an incoming raid restriction from the raid countdown or a chat restriction after viewers arrive.
In this guide
Before you start
- The receiving channel owner’s cooperation.
- Sender, destination, time and exact raid error, if one appears.
Start on the receiving channel
An outgoing /raid command can be valid while the receiving channel’s settings reject the attempt. First establish which direction failed: sending viewers, accepting a raid, or letting arrived viewers speak. Those are different controls. A follower-only message after arrival does not prove the raid itself failed.
Ask the receiving owner to check their settings privately. Twitch reserves viewing and editing incoming raid settings to the owner. A moderator may help read chat or review recent raids without having access to those owner controls.
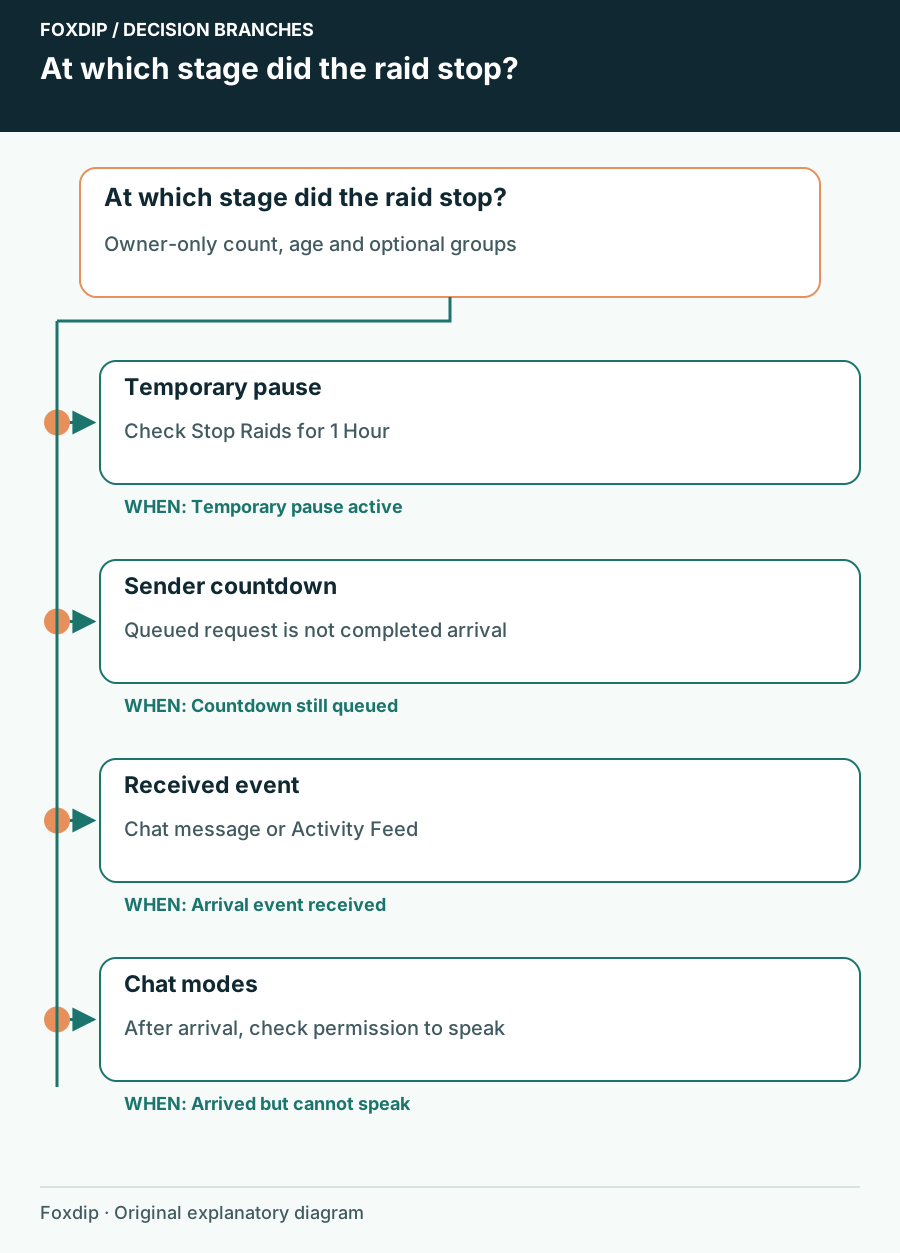
Original Foxdip schematic. Follow the labelled checks alongside the guide.
Compare the actual sender with the rules
Review the incoming viewer range, account-age requirement and any optional allowed groups. Twitch evaluates the sender’s viewer count when the destination is selected, rather than only the number who finally join. Don’t compare the minimum against a screenshot taken ten minutes earlier.
When optional groups are selected, Twitch says a sender must meet one selected group, as well as the count and age thresholds. If the owner belongs to several teams, the teammate option uses the main team. Keep the rules appropriate to your channel’s needs; you don’t need to remove every protection to diagnose one failed attempt.
Check the temporary stop before editing permanent limits
Look for an active Stop Raids for 1 Hour quick action in Stream Manager. The owner can let the pause expire or re-enable incoming raids when ready. Check this before widening permanent eligibility rules: otherwise you may change a safety preference while leaving the temporary block in place.
If the receiving owner does change a rule, save it and agree on a single fresh attempt. Make the smallest change that reflects their actual preference. Keep the previous values privately so an experiment doesn’t become an accidental permanent change.
Watch the raid from command to arrival
The sender can initiate /raid followed by the exact channel name, or use the Raid Channel quick action. Watch for Twitch’s participant countdown and read any error in full. Viewers can opt out, so a final participant count smaller than the original audience is not by itself a failure.
Confirm the destination
Verify the exact channel name and that the receiving creator is expecting the attempt.
Look for: The attempt points to the intended room.
Observe the countdown
Start the raid and wait for the confirmation control; use Raid Now when available.
Look for: Twitch starts the transfer rather than leaving an unconfirmed attempt.
Check receipt
Have the receiver inspect the raid chat message or Activity Feed.
Look for: There is an observable incoming event to compare with the sender’s result.
If viewers arrived, troubleshoot chat separately
If the incoming event appears but nobody can post normal messages, inspect the room’s current follower-only, subscriber-only or emote-only modes. Those govern participation after arrival. Leave the raid settings alone while diagnosing that second symptom.
If a fresh attempt still fails with suitable incoming controls, record the time, sender, destination and exact error for Twitch Support. Don’t publish the owner’s private allow-list settings. Describe the observed result without labelling it a widespread Twitch outage or a known defect unless Twitch has confirmed that status.
Sources & references
Based on the official documentation linked beside the relevant sections. Follow the checks on your own setup; no hardware measurements or account tests are claimed.
- Twitch — How to Use Raids ↗Checked 2026-10-27
- Twitch Developers — Starting a Raid ↗Checked 2026-10-27
Spotted something out of date? Let Alex know.
How we put our guides together ↗