
Choose around the speaking position you can maintain. A close dynamic can suit a busy desk, while a condenser can work in an untreated room when placement and room noise are controlled.
Choose around the speaking position you can maintain. A close dynamic can suit a busy desk, while a condenser can work in an untreated room when placement and room noise are controlled.
In this guide
Before you start
- A short recording of your current mic in the real room.
- The microphone mount and interface specifications.
The room does not choose the capsule for you
Start with a recording of your current microphone at a comfortable speaking distance. Include normal speech, a louder reaction, typing and a few seconds without talking. Listen for the problem you actually want to change: room echo, fan noise, plosives, a thin voice or an awkward position. Those lead to different purchases.
A dynamic microphone is not a room-noise eraser. If buying one lets you put the capsule much closer to your mouth, that new position may be the reason the voice becomes more prominent. Compare microphones at a similar voice level in the finished recording, rather than treating a quieter raw output as proof of stronger rejection.
Repeat the recording with an avoidable noise source removed, such as a fan that can safely be repositioned. Try another speaking direction and move away from a bare wall if the desk allows it. Change one thing at a time and keep the files labelled. You are looking for a repeatable improvement, not a perfectly silent room.
If the voice sounds fine but the pause is noisy, investigate the noise source. If words have a long, obvious tail, buying a different capsule may leave the reflective room audible. Soft furnishings and a less reflective position can be worth trying before a microphone order. Keep anything you add away from vents and lighting equipment.
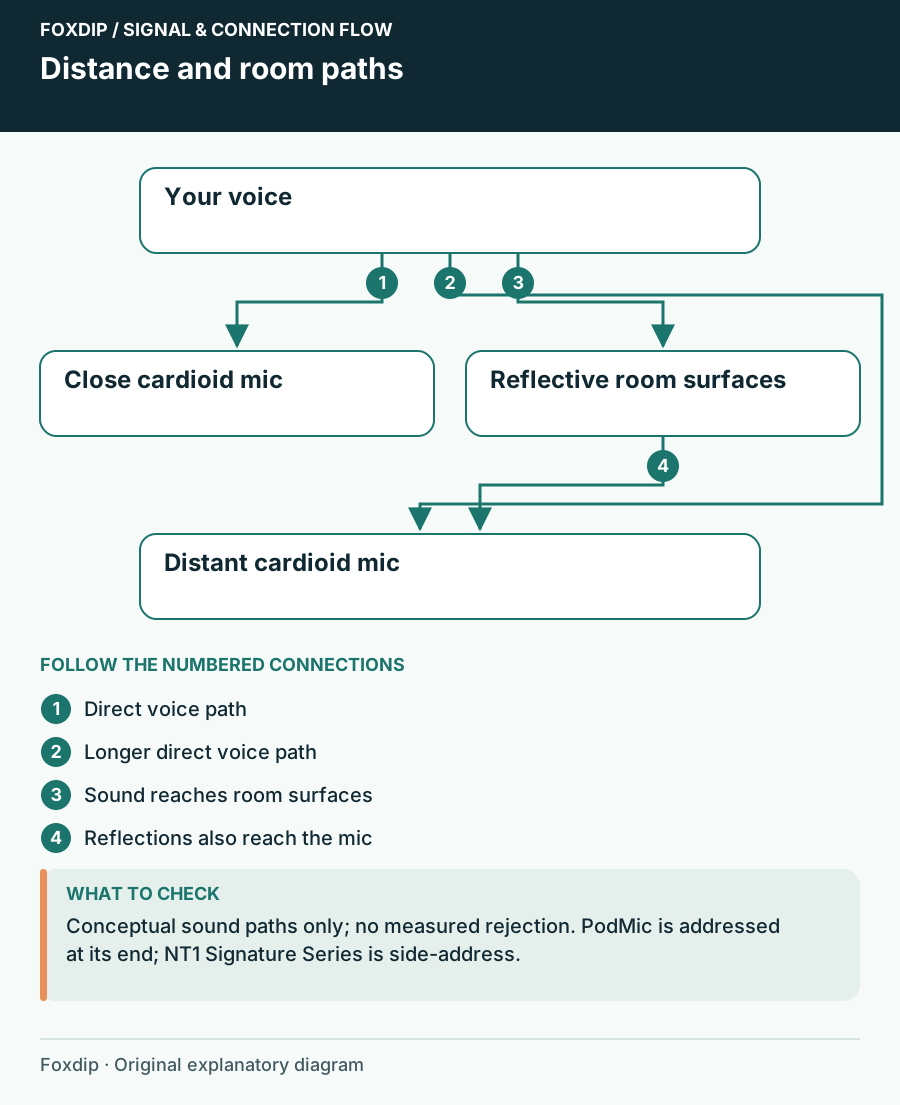
Original Foxdip schematic. Follow the labelled checks alongside the guide.
Two XLR examples, with different supporting equipment
RØDE's PodMic and NT1 Signature Series both use cardioid pickup patterns and XLR outputs. Their capsule and power requirements differ. The figures below identify the equipment you need; they are not a ranking of which will sound nicer on your voice.
| Model | Documented design | What changes at the desk |
|---|---|---|
| RØDE PodMic, original XLR model | Dynamic cardioid; no phantom power required; 937 g | Plan a close speaking position, suitable preamp gain and a mount carrying the full load |
| RØDE NT1 Signature Series | Side-address cardioid condenser; P48 power; 313 g body | Point the correct side at your mouth and count the supplied shock mount and pop filter in the layout |
Choose the microphone position before choosing the finish
Sit where you actually play. Can a microphone stay near your mouth without covering the game, blocking the camera or entering your mouse area? A compact-looking body can still require a large mount. Trace the complete assembly, including connector and cable bend, through your normal movements.
With the NT1 Signature Series, the capsule is addressed from the side. A microphone aimed end-first because it resembles a broadcast mic can produce a disappointing comparison. With PodMic, account for the heavier body before reusing a lightweight arm. Neither choice helps if you keep turning away to read chat.
Compare the complete change, including gain
Both examples need a microphone preamp and an audio interface to reach a computer. Do not compare a bare XLR microphone with the price of a complete USB setup. Count the interface, XLR cable, suitable mount and any connector adapters you truly need.
PodMic's lower published sensitivity means preamp gain deserves attention, but it does not prove you need an inline booster. Read your exact interface's gain specification and make a speech recording with the current combination first. For the NT1 Signature Series, confirm that the interface supplies the documented P48 power. Follow the equipment manuals when connecting or changing power.
Keep the current microphone when the obstacle is elsewhere
Keep a working USB condenser if moving it closer already gives you an intelligible voice and a comfortable desk. Choose a dynamic when its mounting and close-speaking workflow solve your particular problem. Choose a condenser when its placement, power needs and room result fit your voice work or instruments as well as streaming.
During the return period, compare ordinary speech in your real scene, with processing held consistent. Listen at similar playback levels. The decision is whether the new setup improves the issue you named without creating a worse one, such as an arm in the mouse path or a voice that disappears whenever you lean back.
Rehearse a speaking position before committing to another microphone. Microphone Distance and Placement: Find Your Speaking Position ↗
Compare the room tail separately from keyboard noise
Name the sound you want to reduce before comparing capsules. Record a short sentence with a deliberate pause, then type while saying the same sentence. A ringing tail after speech, a steady fan and isolated key clicks are different observations. Write which one matters in the finished stream.
For each candidate, compare at a similar finished voice level and a position you can maintain. Avoid choosing the quieter file merely because its overall gain is lower. Suppression software is documented for mild background noise; that description is not evidence that it can make a reflective room disappear.
| Observation | Next change | Expected result |
|---|---|---|
| Words are followed by a noticeable room tail | Try a less reflective position with the current mic | Check whether the tail changes before a capsule purchase |
| Fan noise dominates mainly in pauses | Reposition the avoidable noise source and compare mild suppression | Keep soft speech understandable |
| Keyboard competes while you speak | Compare relative microphone and keyboard placement | Judge the overlap rather than silence alone |
Investigate typing noise independently when that is the actual distraction. Quiet Keyboards for Streaming: Three Low-Profile Options ↗
Sources & references
Manufacturer specifications and primary support documentation checked on 27 October 2026. Recommendations are editorial inferences from connections, placement and documented capabilities; no hands-on performance or comfort measurements are claimed. November 2026 addition: documentation-based diagnostic examples; no new hands-on hardware result or platform upload test is claimed.
- RØDE PodMic official datasheet ↗Checked 2026-10-27
- RØDE NT1 Signature Series official datasheet ↗Checked 2026-10-27
- RØDE: connect NT1 Signature Series to a computer ↗Checked 2026-10-27
- OBS — Noise Suppression Filter ↗Checked 2026-11-04
Spotted something out of date? Let Alex know.
How we put our guides together ↗