
Keep the original. Choose a suitable HandBrake preset, make a small quality adjustment, preview a representative section, then save and check a separate sharing copy.
A sharing copy you have checked for file size, readable detail, playback and audio.
In this guide
Before you start
- A completed recording that opens and plays.
- HandBrake installed on your computer.
- Enough space for a separate output file.
- Images show the older macOS layout from the official docs. Match the named controls to your installed version.
Keep the recording you can return to
Make a separate sharing copy and leave your original recording in place. Before changing anything, write down its duration and file size and decide where the copy needs to go. A clip for a chat attachment and a recording for an editor can have different requirements.
Pick a section that represents the difficult parts of your footage: movement, small interface text, dark areas or a face. You will use it to judge your changes. A quiet opening screen alone is a poor basis for deciding how the rest of a session will look.
Open the file and choose its destination
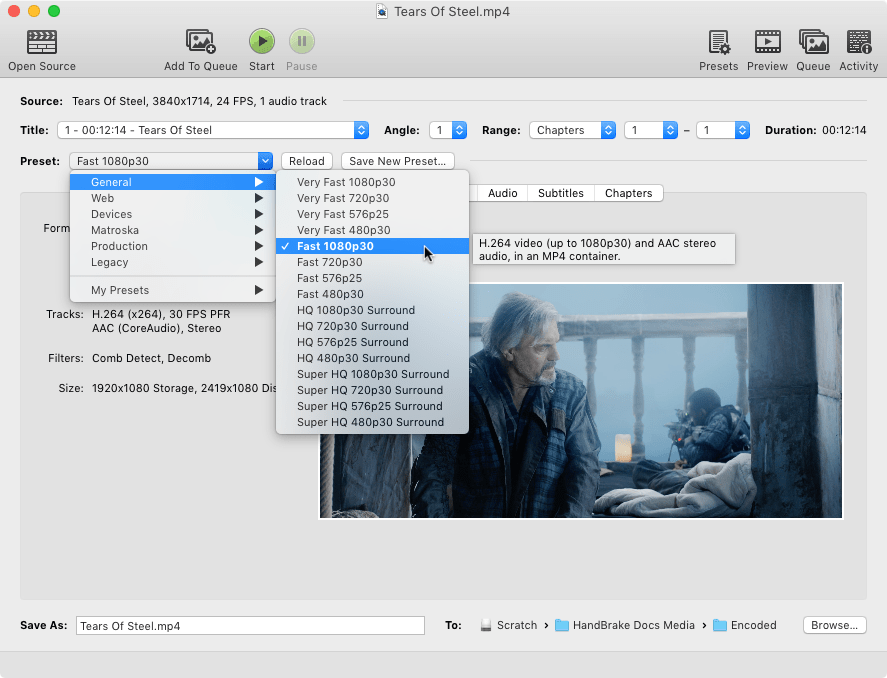
Open the recording in HandBrake and select the title you want. Choose a preset suited to the destination, then set a new output name and folder. Read the planned resolution before continuing; choose deliberately if you want to keep a higher-resolution recording.
Check both the preset name and planned resolution. A preset that makes the file easy to send may also reduce the resolution, so decide what detail you need to keep before starting the encode.
 123
Choose the preset deliberately, then give the sharing copy a new name. Check its planned resolution before starting.
- Preset menu
- Name the separate copy
- Choose its folder
Change one quality control at a time
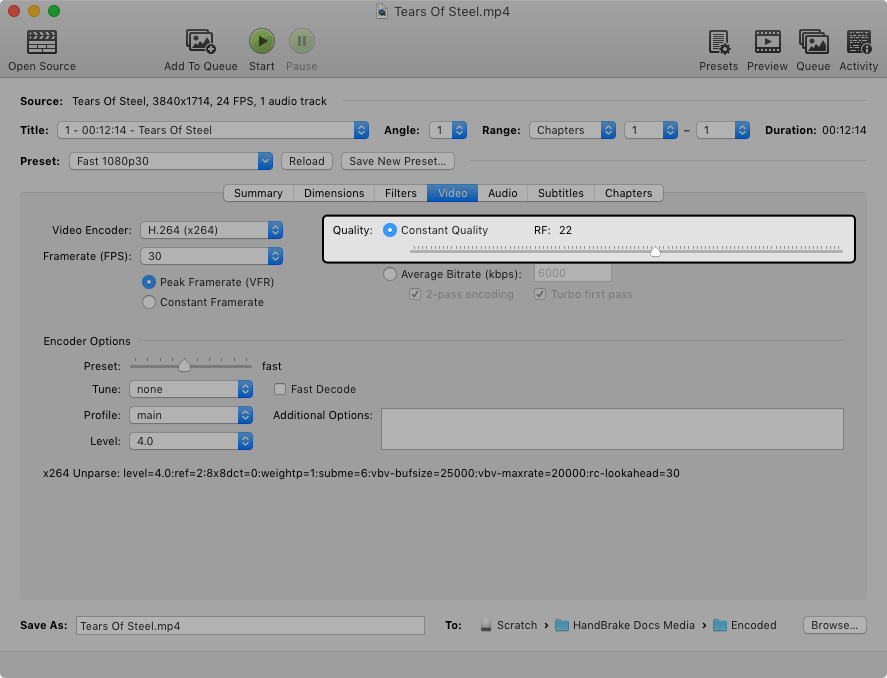
Open Video and keep one encoder selected while adjusting its quality control. With H.264 (x264), a higher RF number means lower quality. Try a small increase, then preview it. A copied RF value does not mean the same quality across different encoders.
Judge the details you need: chat text, small icons, fast movement and the edges of a face. If the smaller copy loses those details, return toward higher quality and try another short preview.
 123
The quality control lives on Video. Keep the encoder the same while comparing two RF values.
- Video tab
- Keep the same encoder
- Constant Quality and RF
Preview before committing to the full session
Open Preview, choose a position and a short duration, then select Live Preview. Play that sample before starting the complete conversion. If the text or movement looks unacceptable, adjust the setting and make another preview.
Once the preview looks right, start the full encode and let it finish. File-size reduction varies with the recording and settings, so compare the finished copy with the limit you need to meet.
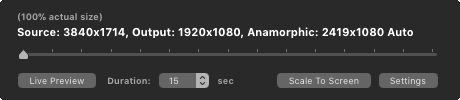
Choose a representative position and a short duration, then create a Live Preview.
Check the copy where you will use it
Open the finished output in its intended destination. Check the beginning and a later section, listen to the audio you need, and compare legibility with the original. Record the new file size alongside the settings you chose so you can repeat a useful result.
If the file still exceeds your limit, make another deliberate change and repeat the short test. Keep the version that meets the actual requirement; do not discard the original just because a smaller copy exists.
About the documentation images
This guide adapts HandBrake Documentation. Its adapted text contributions and the reused documentation screenshots are offered under Creative Commons Attribution-ShareAlike 4.0. Credit HandBrake Team and documentation author Bradley Sepos, link the source and licence, and identify changes when adapting them. Film imagery inside a screenshot retains its separate credit.
Preview the hardest passage, not just the opening screen
Choose a short range containing the material most likely to suffer: fast camera movement, fine game HUD text or a dark scene with subtle detail. HandBrake’s Live Preview can encode a small sample, so compare that sample at the destination playback size before processing the whole session.
Keep one change per preview and label the resulting files with that change. A smaller file is useful only if it preserves what the viewer needs. The opening menu of a recording may be easier to encode than the action later in the session and can therefore give a misleading impression.
| Observation | Next change | Expected result |
|---|---|---|
| HUD text breaks up but the scene looks smooth | Compare a higher-quality setting on the same passage | Preserve the information the viewer must read |
| Short preview looks fine but output size is unpredictable | Remember constant quality varies with content complexity | Avoid promising a precise final size from one sample |
| The copy is smaller but editing becomes awkward | Test import and scrubbing in the actual editor | Choose an output that serves its destination |
Sources & references
Settings and workflow follow HandBrake 1.11.0 documentation. The illustrations are the older macOS screenshots still used in those docs; current versions can arrange the controls differently. No file-size reduction or conversion benchmark is claimed. November 2026 addition: documentation-based diagnostic examples; no new hands-on hardware result or platform upload test is claimed.
- HandBrake 1.11.0 — Quick start ↗Checked 2026-10-18
- HandBrake 1.11.0 — Selecting a preset ↗Checked 2026-10-18
- HandBrake 1.11.0 — Adjusting quality ↗Checked 2026-10-18
- HandBrake 1.11.0 — Previewing your settings ↗Checked 2026-10-18
- HandBrake Documentation — License Summary ↗Checked 2026-10-18
- HandBrake Documentation — Credits ↗Checked 2026-10-18
- Tears of Steel image credit — Creative Commons Attribution 3.0 ↗Checked 2026-10-18
- HandBrake — Previewing your settings ↗Checked 2026-11-04
- HandBrake — Adjusting quality ↗Checked 2026-11-04
Spotted something out of date? Let Alex know.
How we put our guides together ↗